Contents
The series overview
- Building a Scalable Website on AWS – Part 1: AWS Route 53
- Building a Scalable Website on AWS – Part 2: AWS EC2
- Building a Scalable Website on AWS – Part 3: AWS RDS DB Install
- Building a Scalable Website on AWS – Part 4: Uploading the Website
- Building a Scalable Website on AWS – Part 5: AWS EC2 Auto Scaling
- Building a Scalable Website on AWS – Part 6: AWS Application Load Balancer & Testing
In the last post, we went through the steps of setting up an AWS RDS MariaDB Database and tested connectivity to it from an EC2 instance.
This post we will
- Upload our website files
- Configure a simple WordPress site.
- Ensure the site is accessible from the internet
*An important note on website choice*
I am using WordPress for this demo but whatever you use, you need to be mindful that you need to ensure it works in a load-balanced configuration.
WordPress doesn’t do this natively.
You will need a way to centrally store files which are subject to change, in a highly available way.
For WordPress, you could use a plugin such as WP Offload Media Lite to store files on AWS S3.
For WordPress plugin and theme updates, you could update a base AMI and update the Auto Scaling Group with this new image after patching is complete. I’m sure there will be more elegant ways to manage this but it will depend on the website software you decide to use.
Uploading the website files
Since I’m just using WordPress, I’ll use wget to download the latest WordPress installation files to the EC2 webserver.
If you are uploading a different platform, then do that instead.
- sudo yum install wget
- cd /var/www/html
- sudo wget http://wordpress.org/latest.tar.gz
- sudo tar -xvf latest.tar.gz
- sudo rsync -avP wordpress/ /var/www/html/
- sudo rm latest.tar.gz
- sudo rm -rf wordpress/
- sudo mkdir /var/www/html/wp-content/upload
- sudo sudo chown -R apache:apache /var/www/html/*
Using the same DNS or IP address which you are using for SSH, open a web browser and access the web server via the same IP/FQDN
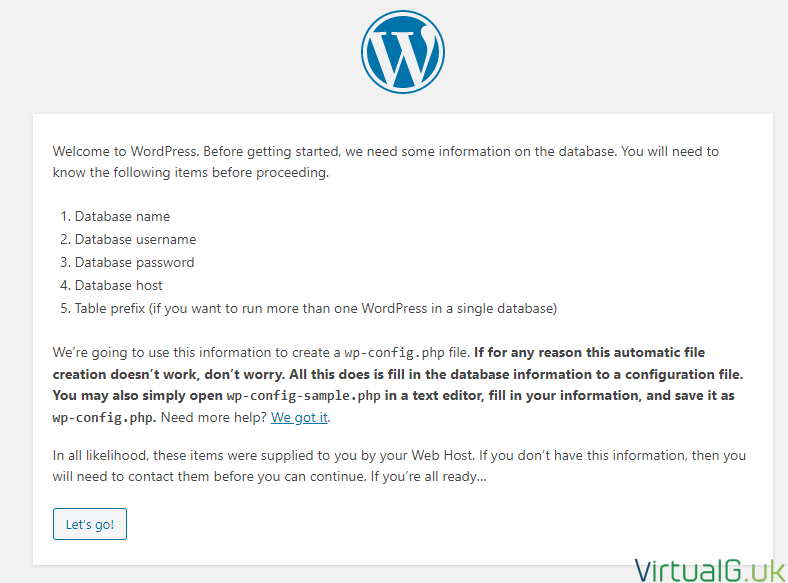
You should see the WordPress setup screen:
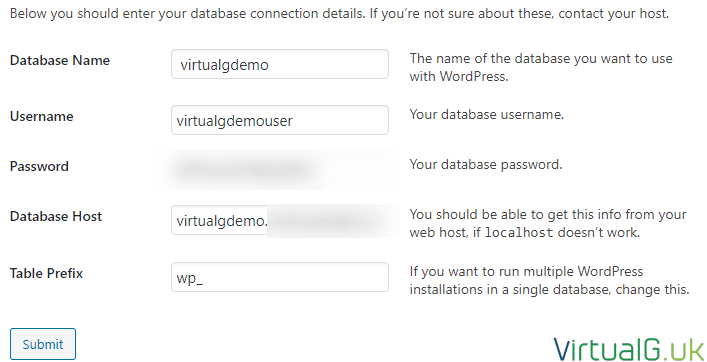
Once this is working, follow the wizard:
- Database name: The can be the same as the database name we created earlier (Part 3)
- Username: As created earlier (Part 3)
- Password: As created earlier (Part 3)
- Database Host: The endpoint of the database we used to test access from the EC2 instance (Part 3)
- Table Prefix: I used the default here, wp_
At this point, I just followed the wizard to install WordPress.
Now the website is operational and connecting to the remote database.
Next steps – EC2 Auto Scale
Next, we can setup EC2 Autoscale. This is not necessary for small sites but it allows for new EC2 instances to be automatically deployed based on the load of your webservers.
We explore this in the next post Building a Scalable Website on AWS – Part 5: AWS EC2 Auto Scaling


