Contents
The series overview
- Building a Scalable Website on AWS – Part 1: AWS Route 53
- Building a Scalable Website on AWS – Part 2: AWS EC2
- Building a Scalable Website on AWS – Part 3: AWS RDS DB Install
- Building a Scalable Website on AWS – Part 4: Uploading the Website
- Building a Scalable Website on AWS – Part 5: AWS EC2 Auto Scaling
- Building a Scalable Website on AWS – Part 6: AWS Application Load Balancer & Testing
In the previous post of this series, we built the AWS EC2 Auto Scaling solution.
In this 6th and final post we will:
- Configure a Load Balancer
- Re-configure the Auto Scaling Group to use the Load Balancer
- Test the Load Balancer
- Test Auto Scaling
Configuring the Load Balancer
The Load Balancer will take connections to the website from the internet and determine which instances to direct these requests to. We will set the load balancer to send connection requests to the EC2 instances which the Auto Scaling group manages.
- On the EC2 console page, open the Load Balancing > Load Balancers wizard
- Select Create a Load Balancer
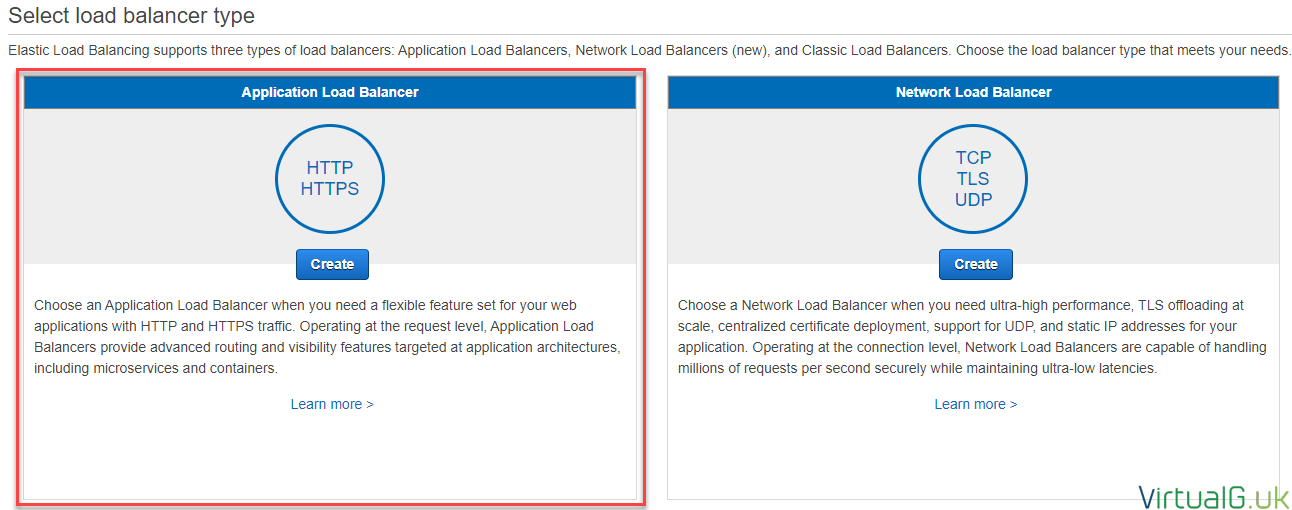
- We want to balance HTTP requests in the demo, so select the Application Load Balancer
Basic Configuration
Set some basic configuration:
- Name: A sensible name for the load balancer
- All other settings are per your specific requirements
- For the Availability Zones, select the same VPC as your instances /Auto Scaling configuration is set to use
- You’ll also want to select the same Availability Zones as you set in your Auto Scaling Group
Security Settings
Since I’m only using HTTP for the demo, I don’t need to configure any security settings but if you do, you need to specify them here.
Security Group
I created a new security group for the load balancer because I only wanted HTTP requests inbound. No SSH access was necessary etc.
Routing
For the routing, I created a new Target Group. You need to modify as required:
- Name: As required
- Target Type: Instance
- Protocol: HTTP
- Port: 80
- Health Checks will run on HTTP and the default path of: /
- The advanced health check settings are fine as they check for a HTTP 200 success code
Instances
Leave this blank for now.
Review the configuration and click Create to commence.
Set the Auto Scaling group to use the Load Balancer
We now need to go back to the Auto Scaling Group and attach it to the Target Group we created for the Load Balancer. This ensures any instances which Auto Scaling creates, are attached to the load balancer.
- On the EC2 console page, open Auto Scaling > Auto Scaling Groups
- Select your Auto Scaling Group and Actions > Edit
- Under Target Groups, select the Target Group which was built as part of the Load Balancer configuration earlier
Sidenote: You will also see some settings which were not available when creating the Auto Scaling Group such as Max Instance Lifetime. This can be a useful setting to ensure all instances are refreshed every so often.
- I also doubled checked the Capacity Min and Max, and saw that Max was set to 1, so I modified this to 3 for the demo.
- Save this configuration.
Security Groups
One final change we need to make is to allow MariaDB / MySQL connections from not just the EC2 instance we created earlier but from any instances in the Auto Scale security group.
- To do this, go to the EC2 console and find security groups.
- Open the security group in use for the RDS instance.
- Edit the entry which permits MYSQL/Aurora access to the RDS instance and add another source. The source needs to be the Auto Scale Security group we created earlier.
At this step, you will probably start to appreciate how important naming everything consistently is within AWS! I could do better myself but everything is traceable back via the ID numbers.
Testing
EC2 Auto Scale Instance Access
All being well, you should be able to connect to the EC2 instance which was created via Auto Scaling:
- Find the instance in your EC2 console and copy the public DNS entry in the Description box
- Paste this into your web browser to test
If this is working, then we need to test that access via the Load Balancer is also working.
Load Balancer Access
- Open the load balancer via the EC2 console page: Load Balancing > Load Balancers > Select your Load Balancer > Description tab
- Attempt to connect to the DNS Name via your web browser
Next, we should use this same DNS Name and create an A record against your name in your DNS Zone.
Create A record in DNS
If you are using Route 53 for this:
- Open the Route 53 console page https://console.aws.amazon.com/route53
- Go to Hosted Zones
- Select your Zone
- Create Record Set
- Name: Blank
- Type: A – IPv4 address
- Alias: Yes
- Alias Target: The Load Balancer DNS name
- Select the Create Button
Test A Record
- Now open a web browser to the domain name you created at the start. In my case this is http://virtualg-demo.com
- Your website should be fully functional with database access
Testing the Auto Scale Group
If you recall earlier, we set the CPU trigger of 15%, on the Auto Scale Group.
To trigger another instance to be created, we need to maintain 15% CPU load on the instances.
To do this I am going to use a command-line tool called stress.
Log in to the instance created by Auto Scale and install stress:
sudo yum install stress
Then run:
stress –cpu 1
This will generate load on one CPU.
- After 5 minutes we should see another EC2 instance being created
Since we enabled CloudWatch logs, we can also see this in the CloudWatch Console
- Open the console https://console.aws.amazon.com/cloudwatch
- Select EC2
- Select one of the EC2 servers within the Auto Scale Group
- Review the CPU usage for this instance
Once there is a sustained CPU load over 15% for the interval set when we created the Auto Scale group trigger, we will see another instance being created:
Sidenote: There are many different configurations available on the Load Balancer and Auto Scale services, be sure to use a combination that works for you in all scenarios.
You might be thinking about how you can ensure that requests are being balanced between all EC2 instanced in the AWS Scale Group.
An easy way to visually test this is to log in to each of the AWS instances and add a bit of text on the home page of your site to echo the hostname of the EC2 instance. Refreshing your browser a few times will show the hostname change.
You could also power off one of the instances and watch your connection be directed to another instance.
Sidenote: Depending on the monitor setup on the Load Balancer, it could take some time to redirect traffic to another instance in the group.
Final thoughts
We’ve successfully demonstrated the flexibility and scalability of some of AWS’s most popular services. Public cloud services, including those from AWS are flexible and can cater for the most demanding applications however we must be careful when configuring such solutions to ensure the best availability and scalability with cost in mind.
We didn’t look into costs as part of this services but be sure to review these in your billing dashboard to avoid any surprises
If you have any comments or suggestions for this any other articles, please feel free to leave a comment or message me on Twitter: @VirtualG_UK
You can also subscribe to the weekly mailing list to get all of my latest posts directly to your inbox.
Thanks for reading and I hope this has been useful!


