Contents
The series overview
- Building a Scalable Website on AWS – Part 1: AWS Route 53
- Building a Scalable Website on AWS – Part 2: AWS EC2
- Building a Scalable Website on AWS – Part 3: AWS RDS DB Install
- Building a Scalable Website on AWS – Part 4: Uploading the Website
- Building a Scalable Website on AWS – Part 5: AWS EC2 Auto Scaling
- Building a Scalable Website on AWS – Part 6: AWS Application Load Balancer & Testing
In the last post, we set up our domain and configured Route 53.
In this post we will:
- Build the EC2 instance
- Install a webserver
Building an EC2 instance
First, launch the EC2 service console and select your desired region on the top right of the page.
https://console.aws.amazon.com/ec2
Select Instances > Launch Instance
For this demo, I’m going to use base my instances on a Linux CentOS 7 Community AMI (Amazon Machine Image):
Select the Instance Type, I selected the t2.micro option, a nice general-purpose, lightweight and cheap option for this demo.
Select Next
Settings
For the demo, all the default options were ideal so I simply selected Next
Specify the storage size and type. You will probably want to select an SSD option. General Purpose SSD is the cheapest but if you require a specific number of IOPS for performance, select the Provisioned IOPS SSD option (but watch out for the costs on those)
Select Next
Tags
Create any tags for this EC2 instance. Tage are useful for reporting and grouping objects together. I’ll specify a new tag key of “platform” and a value of “demo” for both the instance and volume I have created.
Select Next
Security Group
If you don’t already have an ideal Security Group, create one here.
A security group controls inbound and outbound traffic to and from the instance, much like a firewall would.
To start with I’m going to allow SSH from my current IP address and also HTTP and HTTPS from anywhere (This is a webserver after all!)
Select Review and Launch
Select Launch
Create a key pair
For Linux AMIs you need to create a key pair for SSH access to the VM.
Once you have created one, download the .pem file and store is securely. Anyone with this file will be able to login to your instance if you leave port 22 open to the world for instance.
If your SSH client doesn’t support .pem files (Such as Putty) then you need to convert the .pem file to a .ppk file. You can use PuttyGen to do this: https://www.puttygen.com/convert-pem-to-ppk
Click View Instances to continue
Logging in and installing a webserver
AWS does not give you a console to login to your instances, you need to use SSH in this case to manage them.
- On the EC2 console, select the new EC2 instance and note the public IP address in the bottom pane.
From here, your exact tasks will differ because we will probably be using different AMIs and different web servers but I’ll show you the steps I completed so you can adapt to your requirements.
- Using your SSH client of choice and the .pem (or .ppk) file created earlier, login to your instance.
- The AMI which I used for my instance stated in the documentation that the username is centos, but yours might be different.
Update the operating system
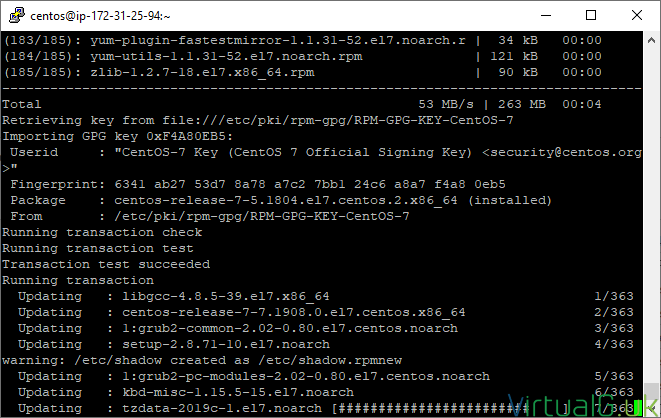
- Once I’m logged in, I update the system and prepare it for installing the webserver
sudo yum update -y
For the demo I am going to be installing a sample WordPress blog.
This will require the use of apache as the webserver with PHP and MySQL or MariaDB for the database.
Apache, PHP and the WordPress files will be installed on the EC2 instance we have just created but for scalability.
The database will be installed onto AWS’s RDS platform, using the MariaDB database type.
Apache Installation
Disclaimer: Through this guide, you might see me installing and uploading files with root / sudo. You should as good security practise, avoid doing this for production systems. Create a new user which has limited permissions to avoid any security issues here.
- Next, I install Apache onto the EC2 instance
sudo yum -y install httpd
- Set apache to start now
sudo systemctl start httpd
- Force apache to start automatically on boot
sudo systemctl enable httpd
We are not installing thee database onto the EC2 instance, but we will still need the database client to connect to the remote database from the instance:
We need to tell CentOS that we want to use the MariaDB 10.3 software rather than the default 5.x software which AWS does not support:
- Create and edit a new file in the yum repo folder:
sudo vi /etc/yum.repos.d/mariadb.repo
- Go to insert mode by typing i
- Paste the following:
# MariaDB 10.3 CentOS repository list - created 2019-02-03 17:47 UTC
# http://downloads.mariadb.org/mariadb/repositories/
[mariadb]
name = MariaDB
baseurl = http://yum.mariadb.org/10.3/centos7-amd64
gpgkey=https://yum.mariadb.org/RPM-GPG-KEY-MariaDB
gpgcheck=1

Save and quit by pressing the ESC key then typing wq:
- Now install the maria-db client
sudo yum groupinstall mariadb-client
PHP Installation
I’m installing a supported version of PHP (PHP 7.2) for this demo, we need to enable the remi-php72 repo so that we can install the required components at the correct version:
sudo yum install epel-release
sudo yum-config-manager --enable remi-php72
sudo yum install php
sudo yum install php-mysql
Restart apache for the PHP changes to take effect
sudo systemctl restart httpd
Next step, deploy the RDS database instance
That’s everything we need to do on the EC2 instance for now.
Go to the next post to set up the AWS RDS database instance and connect the EC2 instance to the RDS DB: Building a Scalable Website on AWS – Part 3: AWS RDS DB Install


