Contents
The series overview
- Building a Scalable Website on AWS – Part 1: AWS Route 53
- Building a Scalable Website on AWS – Part 2: AWS EC2
- Building a Scalable Website on AWS – Part 3: AWS RDS DB Install
- Building a Scalable Website on AWS – Part 4: Uploading the Website
- Building a Scalable Website on AWS – Part 5: AWS EC2 Auto Scaling
- Building a Scalable Website on AWS – Part 6: AWS Application Load Balancer & Testing
In the last part of this series, we setup our webserver.
In this part we will:
- Launch an AWS RDS instance, using the MariaDB database and setup the security group.
- Test EC2’s access to the new database.
Launching a new AWS RDS instance
- Open the RDS service console
https://console.aws.amazon.com/rds
- Ensure you are in the same region as your EC2 instance, you can change this on the top right of your screen
Creating the Database Instance
Select Create Database
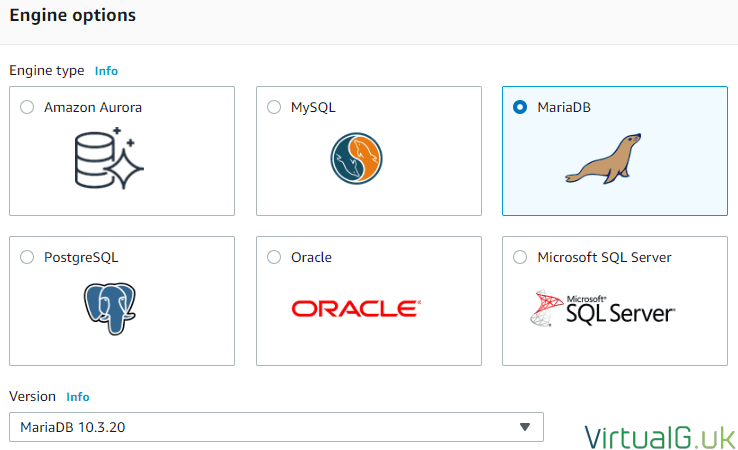
- Choose the desired type, We’re going to use the MariaDB option for the demo but there are many more options available.
Sidenote: Amazon’s flagship Aurora database is an interesting option with backwards capabilities. You can find out more about that here: https://aws.amazon.com/rds/aurora
- Ensure you choose a version compatible with your web server & application
Naturally, we want to give the DB instance an identifier.
- Specify your credentials for the databases instance
You will need these credentials later
DB Size
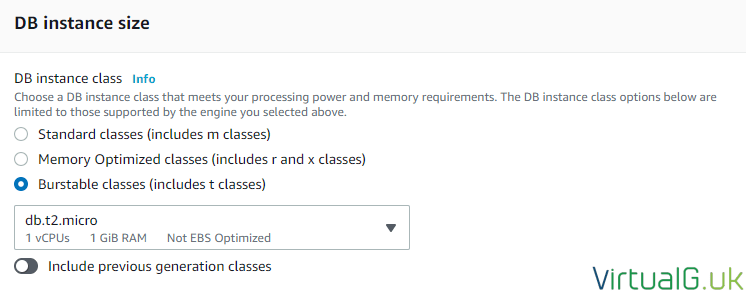
For the DB Instance size, I selected a burstable option which is fine for the demo and micro size sites but if you need sustained and dedicated performance you should look into the other options.
DB Storage
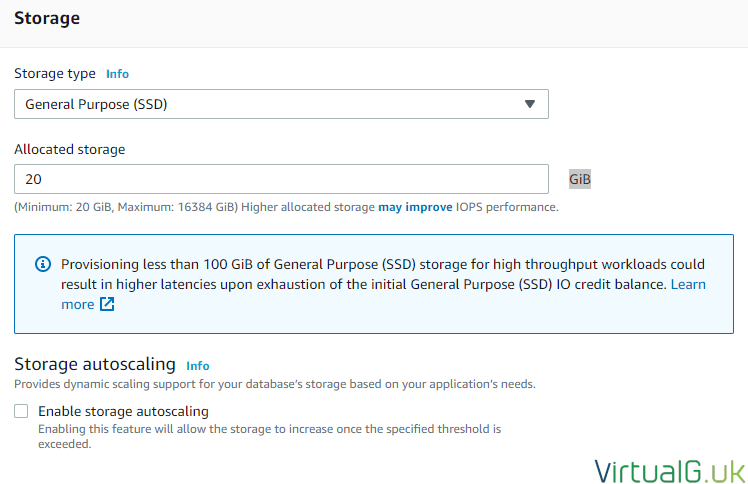
If you recall when we set up the EC2 instance, the provisioned IOPS storage options are significantly more expensive than general purpose. For this reason, this demo will continue to use general-purpose SSD storage.
I did not require autoscaling for the database storage but for obvious scalability reasons you can enable that here. Keep an eye on your costs if enabling such an option.
DB Availability
To protect your Database from either planned or unplanned outages you can deploy a standby instance (an exact copy of your primary, using synchronous replication)
This will double the cost of your DB instance but give you that additional peace of mind. I highly suggest enabling this option for production environments, particularly to prevent maintenance operations on the DB or issues in the availability zone from affecting your website or application.
DB Connectivity
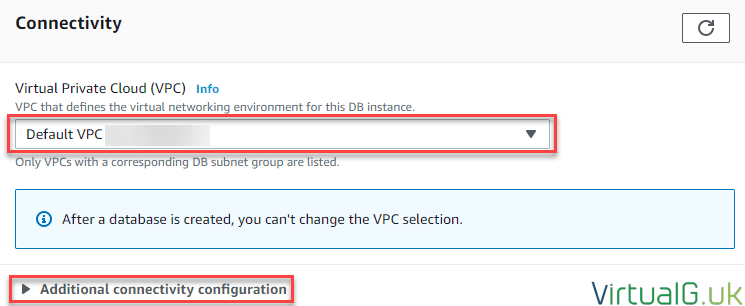
- Under connectivity, you must select the same VPC which your EC2 instances are located:
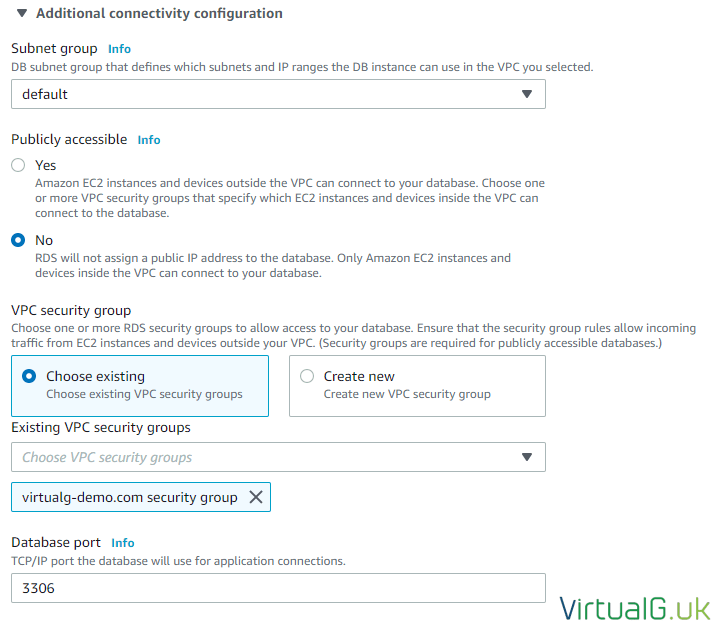
- Select the advanced options
- Ensure the DB instance will not be publicly accessible.
- Feel free to create a new VPC security group here, or use an existing one if a suitable one is already created for this use-case.
Additional Configuration
Under additional configuration we want to set a few options for our demo website:
- Initial database name: virtualgdemo
- Enable automatic backups: 7 days retention period
- Backup Window: Specify as required
- Monitoring: Enabled
- Log exports: All enabled
- Maintenance: I personally like to control database patching so I disable this option
- Delete Protection: Enabled
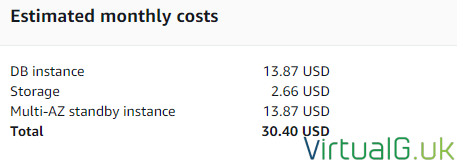
Estimated costs
I don’t think the monthly costs are too high for all the availability and scalability options we have selected.
You can reduce these by changing certain settings.
Monitor the deployment status:
- Once the instance is showing as Available, select the DB identifier to see the configuration.
- Click the VPC Security group:
- Open the security group ID
- Edit the inbound rules
- Add a new inbound rule
You must add the correct traffic type for your database and the source needs to contain the EC2 instance we created earlier.
- Save the new rule
Testing EC2 access to the new database
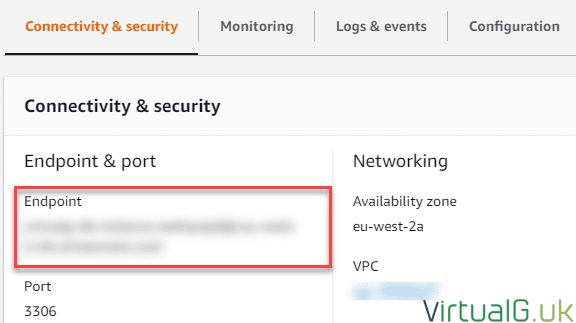
We need to make a note of the endpoint. We will use this FQDN to connect to it from the EC2 instance.
Access is granted via the security group we created earlier and as we specified no public access, there is no public IP address to connect to it on.
- Go back to your EC2 SSH console and test connectivity to the database.
- For this demo, we simply use the following command to test connectivity to the database:
mysql -u virtualgdemouser -p -h db-endpoint-fqdn-here
- Enter the password we created when setting up the database.
If you can successfully connect, great! If not review the error message and ensure your database ‘s security group allows inbound access from your EC2 instance as we set up earlier.
Now we have a functioning database server which we can connect to from our EC2 instance.
Make sure you create the database inside the server for your application at this point:
create database virtualgdemo;
exit
Depending on your operating system, you might need to allow your apache or other webserver to connect to the remote database over the network. If you have SELinux enabled, run:
sudo setsebool -P httpd_can_network_connect_db on
Next step – Upload the website files and configuration
See part 4 for uploading our website files and performing the configuration: Building a Scalable Website on AWS – Part 4: Uploading the Website


