Contents
As cloud adoption increases year on year, and as technologists, we need to keep our skills up to date more than ever before.
We must understand how these technology advancements can help both the businesses we work for and our own personal projects.
This blog started off running on reseller hosting but after completing my AWS Solutions Architect Associate exam, I decided to move the blog to the “cloud”. Of course, the AWS cloud was an obvious choice for me since I had just finished some courses and passed the exam.
This series of blog posts will show what you need to do to create a website on AWS’s cloud platform.
We will build out the following components:
- Route 53 (For DNS)
- 1 x Application Load Balancer
- 1x Auto Scaling Group
- 2 x identical EC2 instances (For the webservers, behind an Application Load Balancer)
- 1x RDS database (with standby instance)
- CloudWatch (for logging and performance monitoring)
The series overview
- Building a Scalable Website on AWS – Part 1: AWS Route 53 (This post)
- Building a Scalable Website on AWS – Part 2: AWS EC2
- Building a Scalable Website on AWS – Part 3: AWS RDS DB Install
- Building a Scalable Website on AWS – Part 4: Uploading the Website
- Building a Scalable Website on AWS – Part 5: AWS EC2 Auto Scaling
- Building a Scalable Website on AWS – Part 6: AWS Application Load Balancer & Testing
Route 53
I should start by saying that you don’t need to use AWS’s DNS service since you can simply create an A record and point it to the public IP of your EC2 instance. However, I wanted this guide to be an A to Z reference so I’ll go through that here:
Domain registration
First, order your domain name if you don’t already have one. You can do this with AWS, or you can use any other domain registrar.
If you want to do this via AWS, you simply open the Route 53 console and search for your desired name and follow the prompts
Create Hosted Zone
Open the Route 53 console https://console.aws.amazon.com/route53
- Navigate to Hosted zones
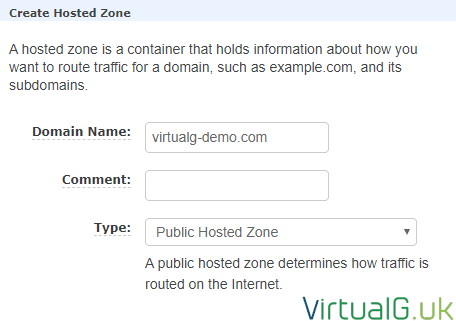
- Select Create Hosted Zone
You do this regardless of where you purchase your domain registration from:
Select Create
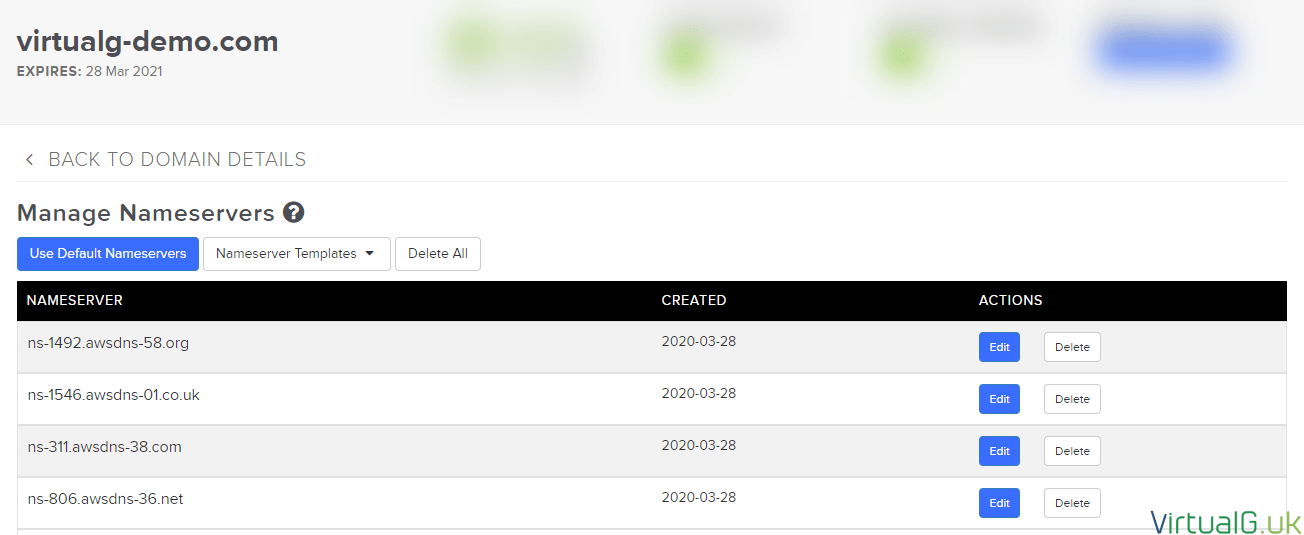
Update your Domain Name Servers
On this new zone, you will see your new domain and a series of NS values.
If you registered your domain outside of AWS, you need to assign these Name Servers (and only these) records to that domain:
Sidenote: AWS is smart here by using one TLD for each Name Server. If a TLD goes offline (rare but could happen) then your site could still remain online.
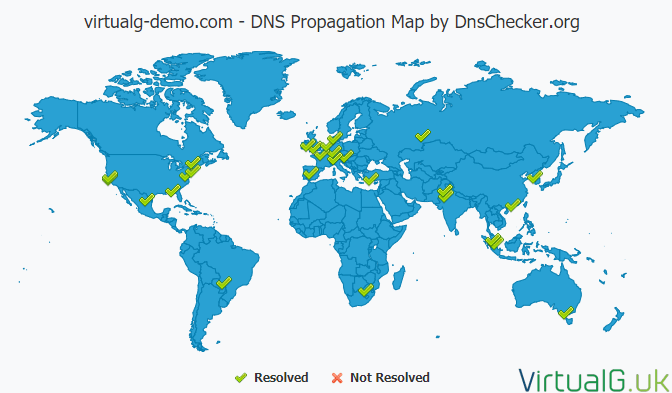
Verify that your NS changes have propagated globally. I use a tool on DNS Checker: https://dnschecker.org/#NS
Next steps, EC2 instances
For now, we are finished with Route 53
Move onto the next post to set up your webservers and auto-scaling: Building a Scalable Website on AWS – Part 2: AWS EC2


