Contents
The series overview
- Building a Scalable Website on AWS – Part 1: AWS Route 53
- Building a Scalable Website on AWS – Part 2: AWS EC2
- Building a Scalable Website on AWS – Part 3: AWS RDS DB Install
- Building a Scalable Website on AWS – Part 4: Uploading the Website
- Building a Scalable Website on AWS – Part 5: AWS EC2 Auto Scaling
- Building a Scalable Website on AWS – Part 6: AWS Application Load Balancer & Testing
In the last post, we installed our website files and connected the website to our RDS database instance.
In this post, we will set up our EC2 instance to auto-scale based on demand.
Create an AMI from the EC2 instance
Auto Scale requires that you “image” your EC2 instance so that it can automatically create new instances from this image.
To do this, first I like to reboot my instance to ensure it comes up and is fully operational:
reboot
Once the instance is back online and the website is operational, create an AMI of the EC2 instance:
- Open the EC2 console: https://console.aws.amazon.com/ec2
- Select your instance
- Actions > Image > Create Image
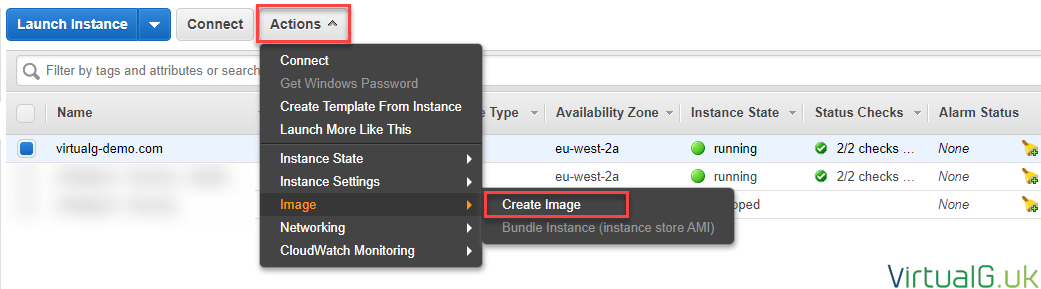
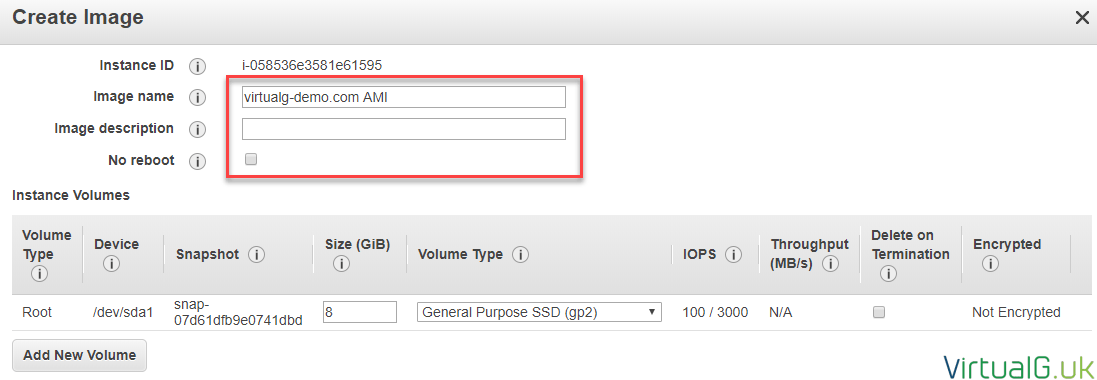
- Give the image a name and description.
- The other defaults are fine but feel free to change them as required
- Pressing Create Image will reboot the EC2 instance. You will want to do this to ensure that a clean image is taken.
Once the AMI is “available”, proceed onto the next section.
Build a Launch Configuration
Next, we need to create a launch configuration for our recently created AMI.
- Open the EC2 console and navigate to Auto Scaling > Launch Configurations
- Create a Launch Configuration
- Select the AMI you created earlier, it will be listed under “My AMIs”

- Chose your instance size, I’ve left mine as a t2.micro for the demo.
- Under the next page, give the launch configuration a name.
- Refrain from using spot instances unless you have a case to do so. Spot instances are not always available on-demand.
- I like to enable CloudWatch Monitoring for visibility into what’s happening.
- I’ve left everything else as default for the demo.
Storage
- On the storage page, I use the defaults.
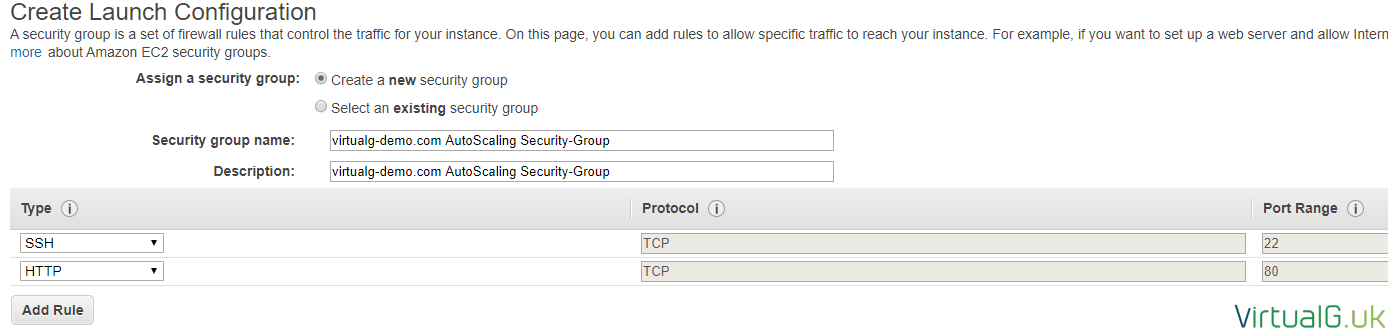
Security Group
- The Security group needs rules to allow traffic from the outside world into your instance. For this demo, I’m allowing TCP port 80 (HTTP) into the instances from anywhere. I’ve also allowed port 22 from my IP address to show you some things later in the demo.
- You can add and remove to the security group at any time in the future so feel free to disable SSH until when you need it.
- Be sure to give your security group a useful name.
- Go to the review page and double-check your settings.
- Then Create Launch configuration
- Finally, either create a new key pair or use an existing one.
- I’m just going to use the same key pair as I created for the initial EC2 instance.
- For production, you might want to create a new one as these ECS instances will be live.
- You don’t want to be manually editing anything on the auto-scales EC2 instances. Be sure to update the master AMI and reconfigure the Launch Configuration accordingly after any changes to the web servers.
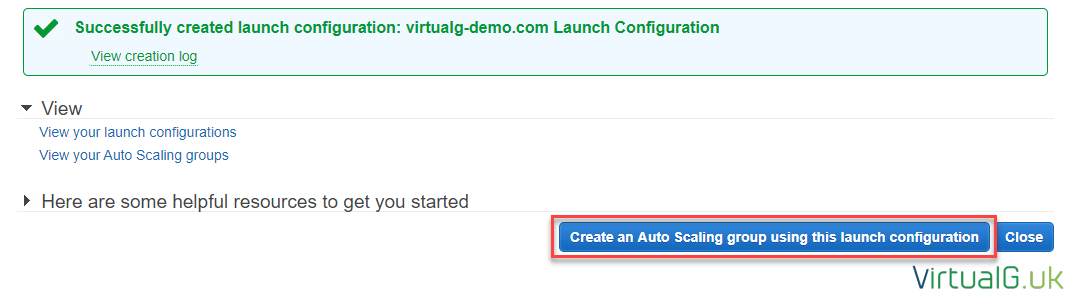
Create an Auto Scaling Group
The wizard directs us straight into the Create Auto Scaling Group wizard, so lets hit that button and proceed.
- Give your new Auto Scaling Group a name.
- I’ve set my group to start with 1 instance in my default VPC. (I will use a scaling policy on the next page to automatically create new instances)
- For Subnets, if you select multiple subnets in different availability zones, AWS will do it’s best to balance new EC2 instances across these AZ’s. I’ve selected all 3 in my region to use this nice availability option.
Advanced Settings
- Under advanced settings, we will be using a load balancing option later but leave this blank for now.
- For the demo, everything else remains as default.
Scaling Policy
To give us the best scalability options for the webserver, we can create a scaling policy:
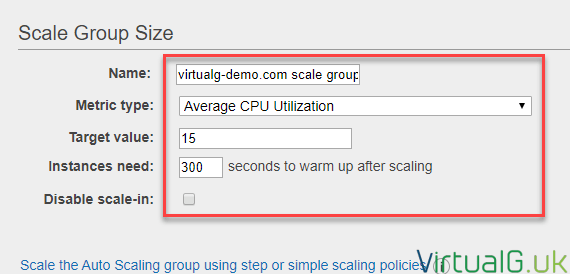
- I’ve chosen to scale between 1 and 3 instances here.
- In the group size, I’m going to scale based on CPU because this is easily demonstrated but you might want to base this on something else.
- I’m going for only 15% CPU utilization as the target value (for demo purposes)
- I’m leaving scale-in enabled so that instances which are no longer needed can be removed automatically to save some of the budget and manual overhead.
Notifications
AWS can email you with certain notifications:
- You will need AWS SNS set up before you can send notifications.
- Since SNS is out of scope for this demo, we won’t configure it here today.
Tags
- Create any tags you need and go to the Review page
- Once happy with the configuration select the Create Auto Scaling Group button
That’s the AWS Auto Scaling configuration complete.
Next Step – Deploy the AWS Load Balancer
In the next post we setup the Load Balancer and test everything is working: Building a Scalable Website on AWS – Part 6: AWS Application Load Balancer & Testing