Contents
Before you can upgrade your ESXi hosts to ESXi version 7.0, you need you have upgraded you vCenter Server first.
There are many other things you will need to check before upgrading your vCenter Server:
Pre-upgrade considerations
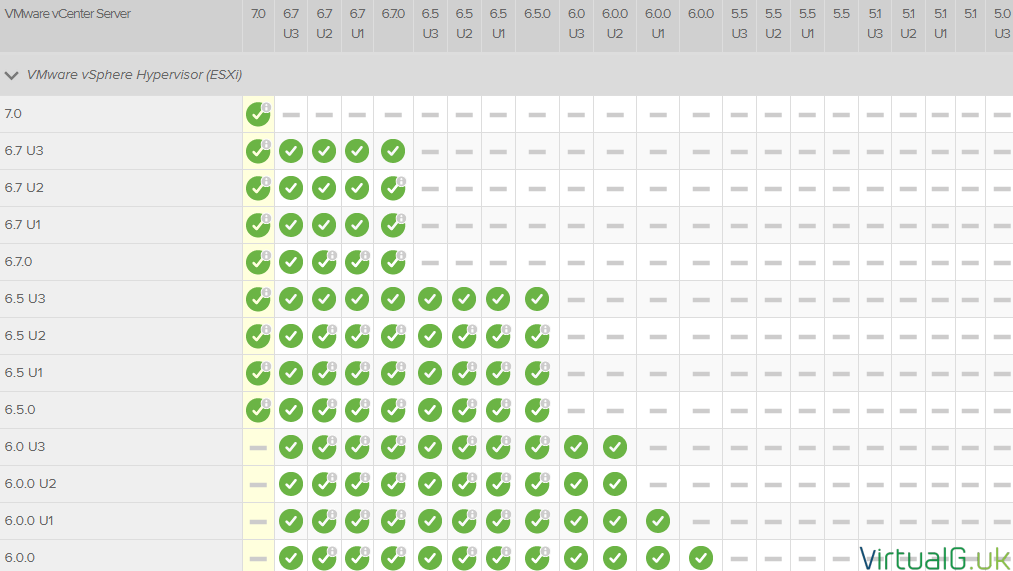
VMware Interoperability Matrix
- Ensure all your other VMware solutions support the target vCenter Server version including:
- ESXi
- vSphere Replication
- Site Recovery Manager
- vRealize Operations Manager
- Horizon
- Skyline
- etc
The VMware Interoperability Matrices can be found here: https://www.vmware.com/resources/compatibility/sim/interop_matrix.php
3rd Party Products
- Ensure all other solutions which connect to the vCenter Server are supported in the target vCenter Server version. This includes things like:
- Backup software
- Monitoring and alerting platforms
Release notes
Always read the release notes for the target version which will include known issues and limitations.
The vSphere release notes for 7.0 are here: https://docs.vmware.com/en/VMware-vSphere/7.0/rn/vsphere-esxi-vcenter-server-70-release-notes.html
Upgrade documentation
You must also read the upgrade documentation for your target version. VMware periodically changes how upgrades are performed so it is always important to read and understand those.
The vCenter Server 7.0 upgrade documentation is made available here: https://docs.vmware.com/en/VMware-vSphere/7.0/com.vmware.vcenter.upgrade.doc/GUID-9ED7B32A-019F-4A97-BC58-1A9BF7D16C57.html
Licensing
Check your entitlements in the my.vmware.com portal for licenses to use your target version and upgrade your keys before the upgrade to avoid any licensing issues.
Here is the guide to show you how to upgrade your VMware license keys: https://kb.vmware.com/s/article/2006974
Upgrade path
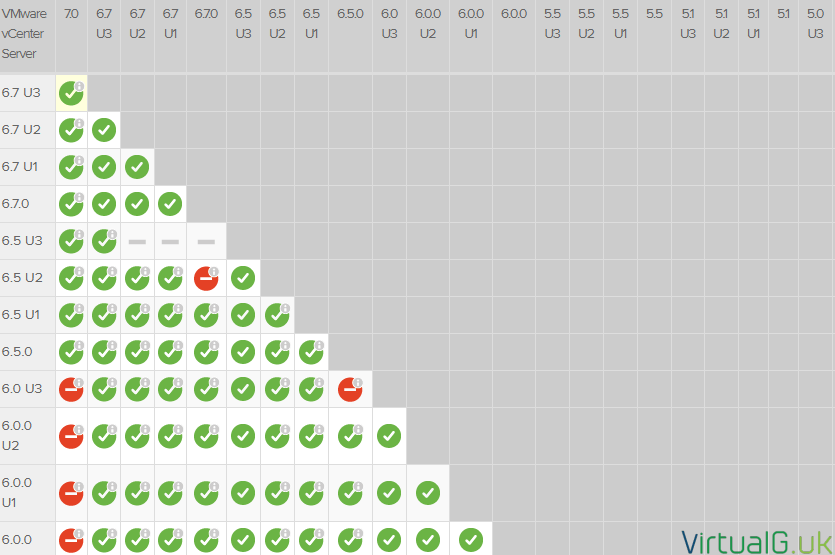
Check that the version you are upgrading from and to is a direct path. In some cases, you will need to perform 2 upgrades to get to the target version.
Supported upgrade paths for all of VMware’s solutions are available here: https://www.vmware.com/resources/compatibility/sim/interop_matrix.php#upgrade
The upgrade procedure
Stage 1 – Deploy vCenter Server
You will need to download the VCSA ISO file for your target vSphere version form the my.vmware.com portal.
In my case, this was: VMware-VCSA-all-7.0.0-15952498.iso
Once you have it downloaded, mount the ISO to your local machine’s DVD drive and browse its contents:
The easiest way to run the installer is via the UI installer (However there is a CLI option too)
- To access the UI installer browse to the following location (For Windows) from the mounted DVD:
- vcsa-ui-installer\win32
- To launch the installer, run installer.exe
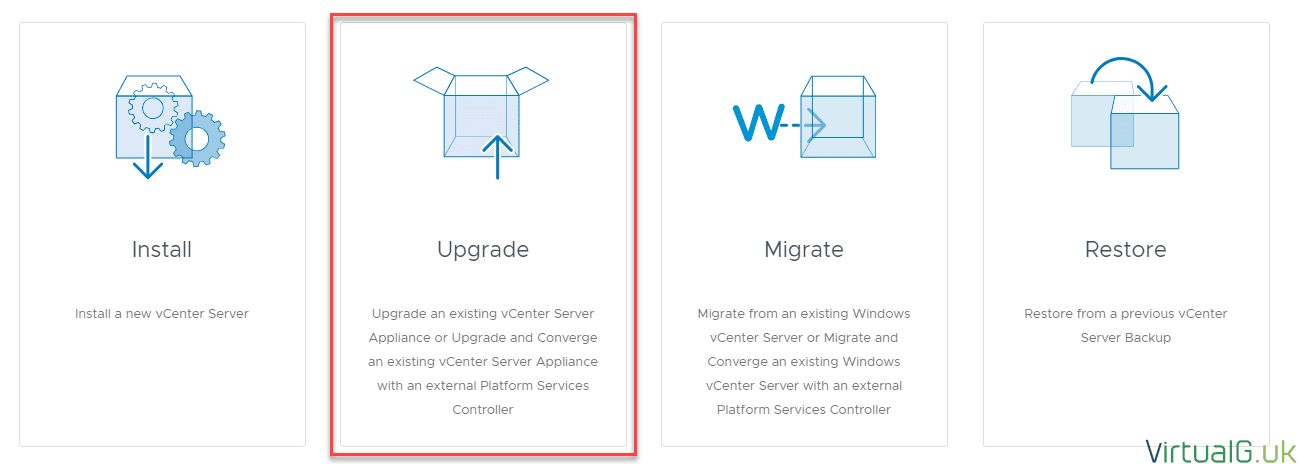
- When the installer opens, select the Upgrade option:
Nowadays, when you upgrade the VCSA, it deploys a new one and copies over your configuration. This is a nice clean way to approach upgrades.
If you have an external PSC, it will be converted to an embedded topology as part of this process since the external PSC is no longer required or supported in vSphere 7.0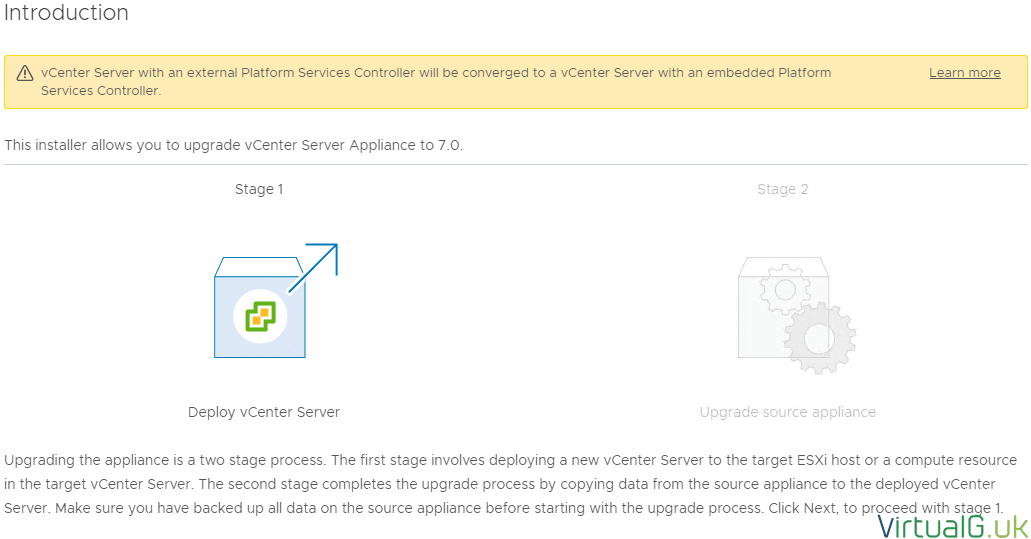
- Select Next to proceed
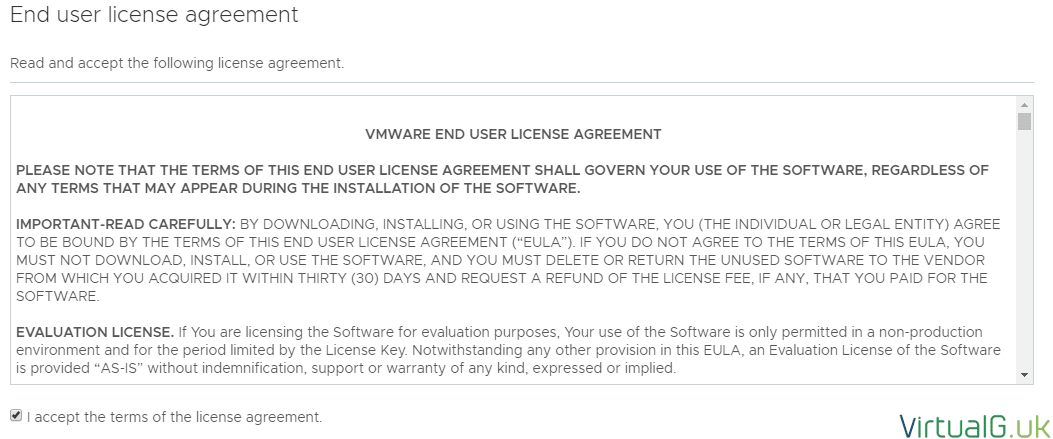
- Accept the EULA
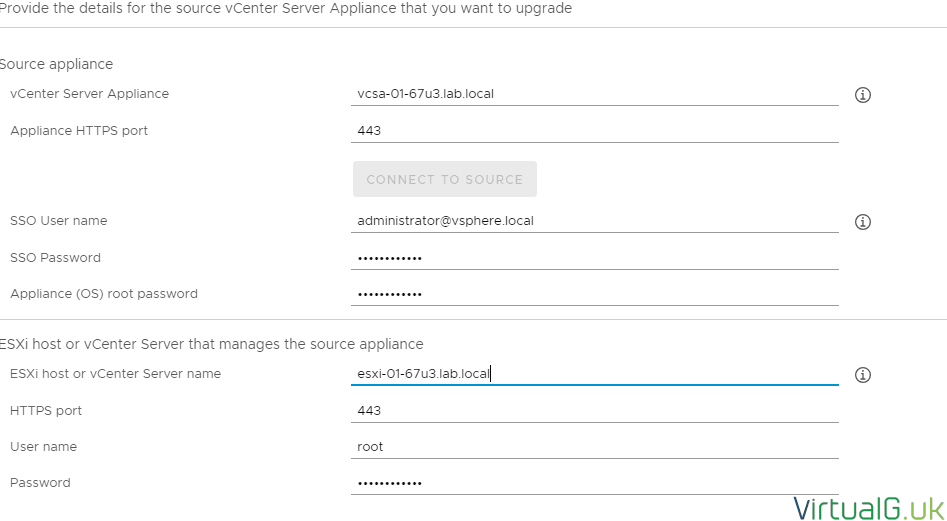
- Next, you need to enter the FQDN of the existing vCenter Server Appliance
- Hit the Connect to Source Button and enter the remaining fields for the existing environment
- Select Next and accept the certificate warning if prompted
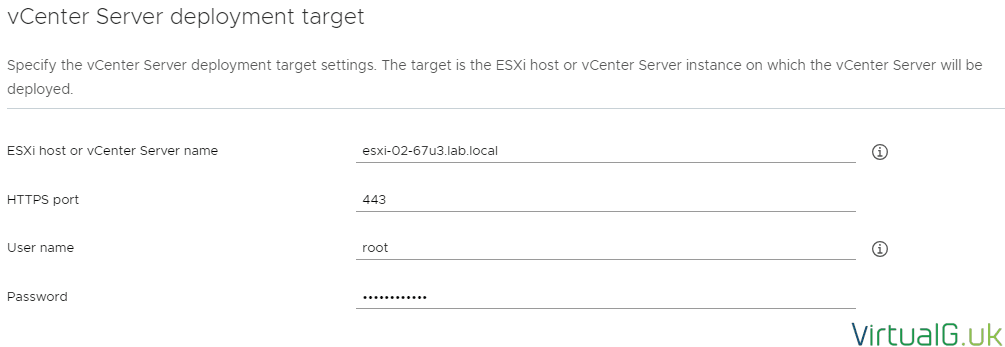
- Enter the details of an ESXi host or vCenter Server to deploy the new appliance to
- Enter the name of the new VCSA VM as you want it displayed in the vSphere UI
- Set the root password
Choose the size of the deployed VCSA, In this lab I only have 2 hosts and 3 VMs (Which is shown in the installer, very useful!)
The Tiny deployment size is therefore recommended to me.
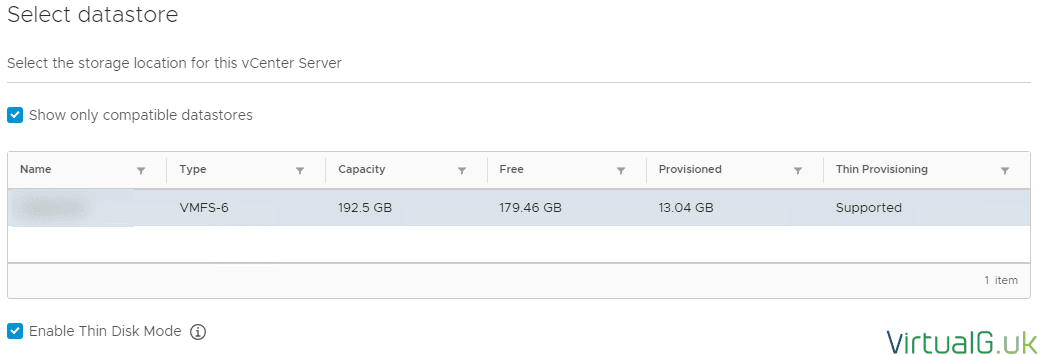
- Specify on to which datastore to deploy the new appliance. Refer to the table above as to approximately how much free space you need. (Don’t forget any overheads such as SWAP space etc)
- Enable thin provisioning for the VCSA if required
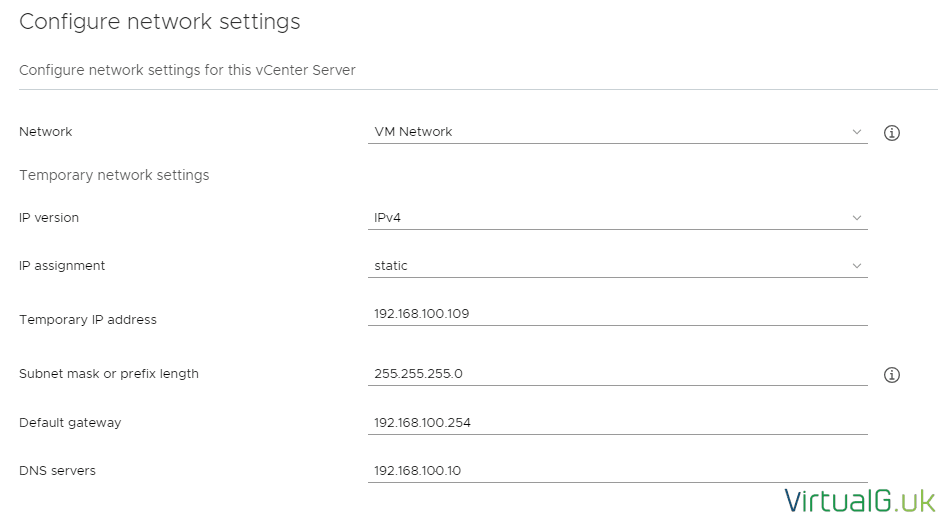
- Set the initial (temporary) IP settings for the VCSA.
Once deployed, the installed will change these back to the same as the original VCSA.
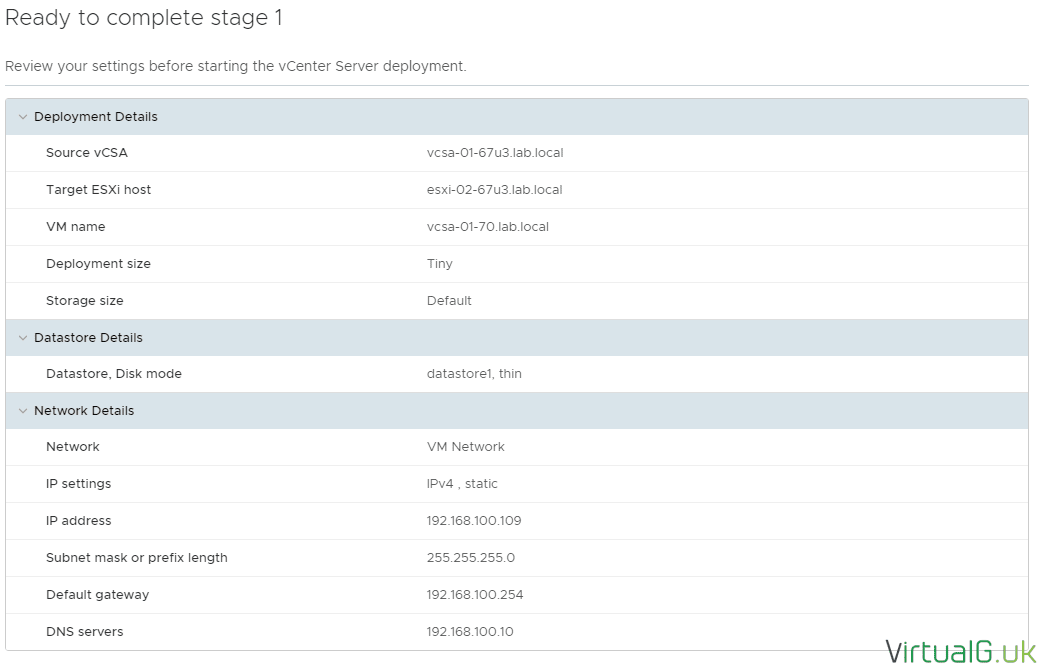
- On the review page, ensure everything is correct and hit Finish to complete Stage 1
At this point, the upgrade will commence:
- Once complete, move onto stage 2
Stage 2
Stage 2 deals with the configuration and migration to the new appliance.
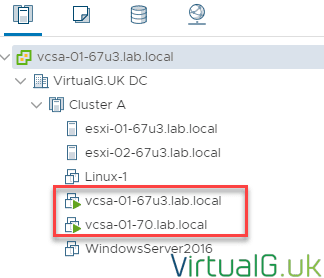
By now you will see both the old appliance which is still online and the new appliance also powered on in your environment:
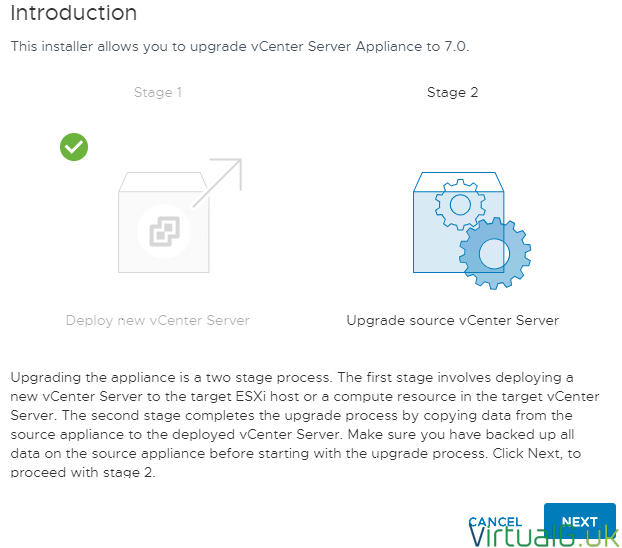
With Stage 1 complete, select Continue to move through to Stage 2:
- After the upgrade checks complete, review any recommendations which are presented.
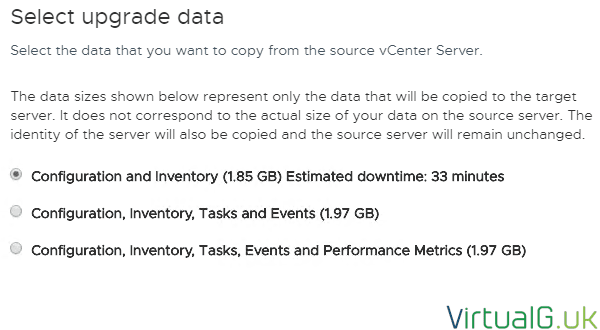
- Once happy to continue, select what data you want to migrate to the new appliance.
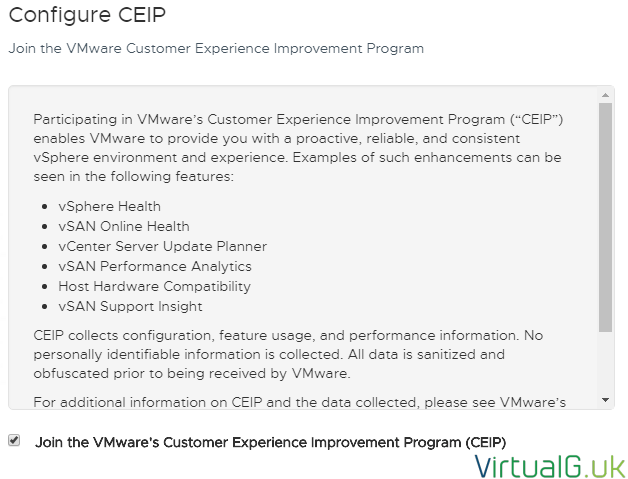
- Select your CEIP preference
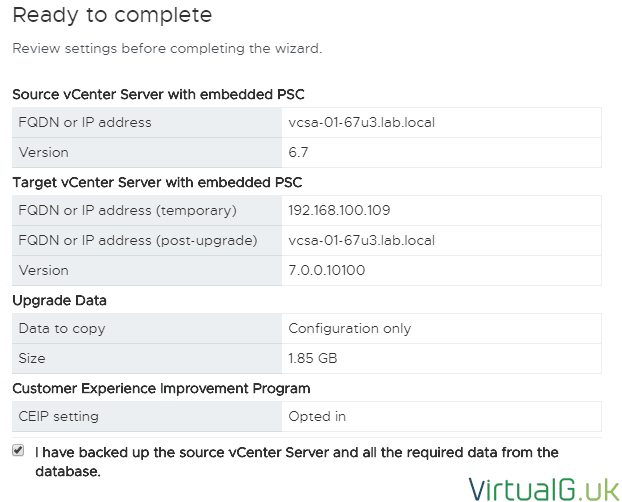
- Finally, review the configuration and backup your VCSA.
- Once the VCSA is backed up select finish to continue.
Note that this will power off your existing vCenter Server Appliance
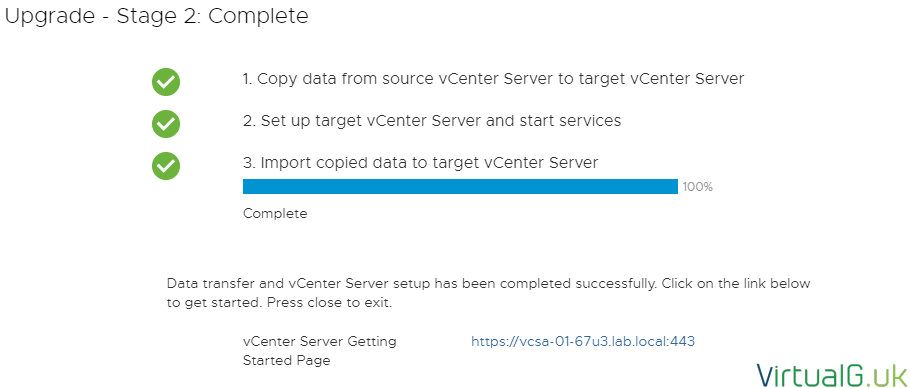
- Monitor the progress of the data transfer and setup:
After Stage 2 is complete, your VCSA will have been fully upgraded to the target version.
The old vCenter Server appliance will be in a powered-off state. You can keep it like this as a form of backup.
If there is anything wrong with the new VCSA then you can simply power it off and power on the old one.
Make sure you enable the file-level backup feature before doing anything else!
Enjoy your new VCSA running version 7.0!
Be sure to read about my favourite new vSphere 7 features: VMware vSphere 7.0 Top 5 Features!


