Contents
With ESXi 7.0 being announced, I have run through the upgrade procedure in my lab and documented it here for anyone interested.
There are a few ways you can upgrade ESXi. The much-preferred way being through Update Manager and the second via ESXi CLI.
Update Manager has come a long way since it’s introduction many years ago. In fact, Update Manager (Now called Lifecycle Manager or VLM) in vSphere 7.0 is much more feature-rich, including built-in HCL and software interoperability checks. You can find out more about those features in my post: 5 Must Know Features of vSphere 6.7
Upgrading ESXi with Lifecycle Manager (Formally Update Manager)
Before any ESXi upgrade, be sure to check the release notes and the official upgrade guides to ensure nothing is missed and you mitigate as much risk as possible.
Another point before upgrading ESXi with Lifecycle Manager is that vCenter Server must be running the same or higher version as your ESXi host target version. This is because vCenter Server cannot manage hosts running a higher version than itself.
Here is a walkthrough of upgrading your VCSA from version 6.7 to 7.0: Upgrade vCenter Server from 6.7 to 7.0
ISO Upload & Baseline Creation
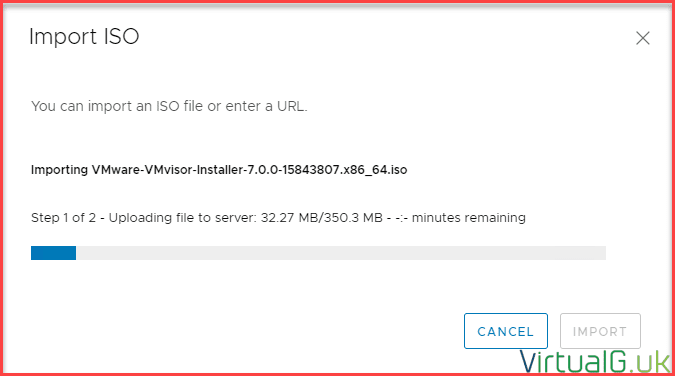
Once you have the VCSA upgraded, you need to upload the target ESXi ISO to Lifecycle Manager:
- Open the vSphere Client
- Navigate to Menu > Lifecycle Manager
- Select the Imported ISOs Tab
- Click the Import ISO link
- Browse for your ESXi ISO Installer ISO
Once the upload is complete:
- Click the New Baseline Link
This baseline will contain the ESXi ISO we uploaded earlier and be attached to the ESXi hosts which we want to upgrade.
- Give the baseline a name and description
- Next
- Ensure the ESXi ISO which we uploaded earlier is the only option selected
- Next
- Review the details and select Finish
Attach Baseline to Hosts or Cluster
Now that the baseline is created, we need to attach it to the hosts we wish to upgrade. You can do this on a per-host basis or for an entire cluster. In my lab, I’ll perform the upgrade on a single host:
- Select a host from the Hosts & Clusters view
- Go to the Updates tab
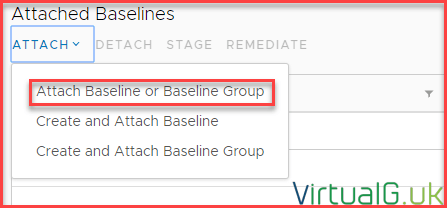
- Click the Attach dropdown then Attach Baseline or Baseline Group
- Select the ESXi 7.0 baseline which we created earlier
- Attach
If you have any other Upgrade baselines attached, now is a good time to remove them
- Select other upgrade baselines already attached to the host and select Detach
Checking Compliance
- Click the Check Compliance button
This will scan the ESXi host to see if it already has the upgrade applied or not.
You should see that the ESXi host is not compliant with the attached baselines:
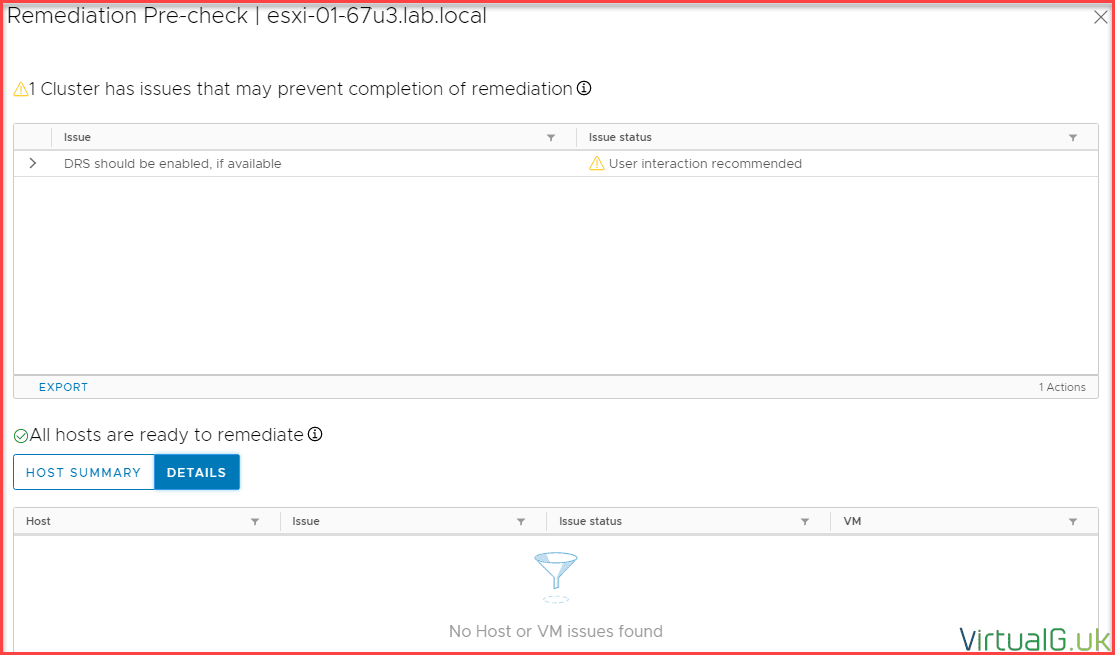
- Next, select the Pre-Check Remediation button
This will check for any compliance issues and bring them to your attention before we start the upgrade
In my lab, I simply needed to enable DRS so that the upgrade process could automatically vMotion VMs off the host for me.
Remediation
Once all pre-checks pass, you can move onto initiating the upgrade
- Select the ESXi 7.0 baseline and the Remediate Button
- Accept the EULA
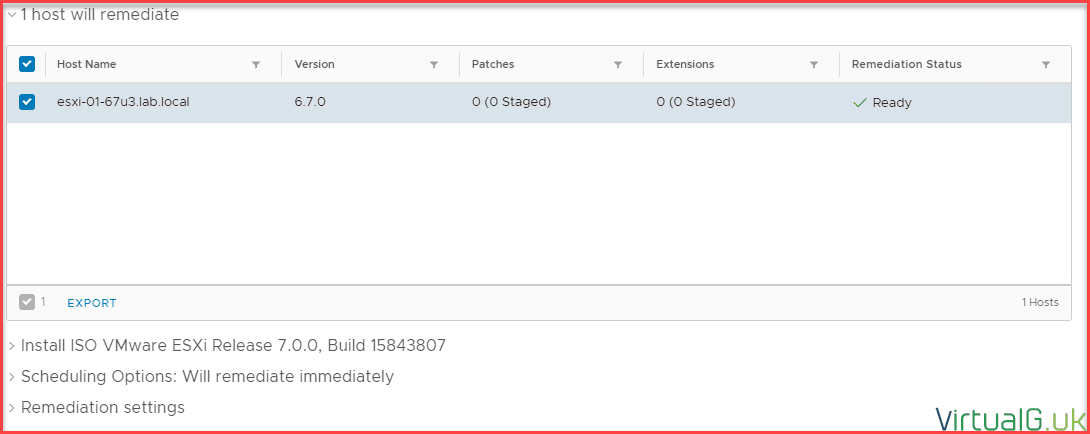
On the final page you can review some of the advanced settings by expanding them.
These include useful features such as scheduling and changing the remediation settings.
- Once everything is set up as required then you can hit the Remediate button which will start the upgrade process.
You can keep an eye on the progress by monitoring the Recent Tasks pane:
Once the upgrade has finished, you will see the ESXi host connected back into vSphere Client and operational again, running the new 7.0 version.











from where u can download VMware 7 ?
thank u
Please see this link to download vSphere 7.0 https://my.vmware.com/en/web/vmware/evalcenter?p=vsphere-eval