Contents
A signed SSL certificate for vCenter server is crucial for maintaining confidentiality, integrity, and trust in the management and operation of virtualized environments.
An SSL certificate provides secure communication between the vCenter server and your web browser. This ensures that sensitive data, such as login credentials and administrative commands, are encrypted and protected from interception by unauthorized parties.
How do you create a signed SSL certificate for vCenter Server 8?
As with any SSL certificate, there are 3 main steps:
Generate a Certificate Signing Request (CSR)
First, log in to the vCenter Server with an account with administrator privileges
On the top left menu, navigate to Administration > Certificate Management
Under Machine SSL Certificate Select Actions > Generate Certificate Signing Request (CSR)
Enter the requested information:
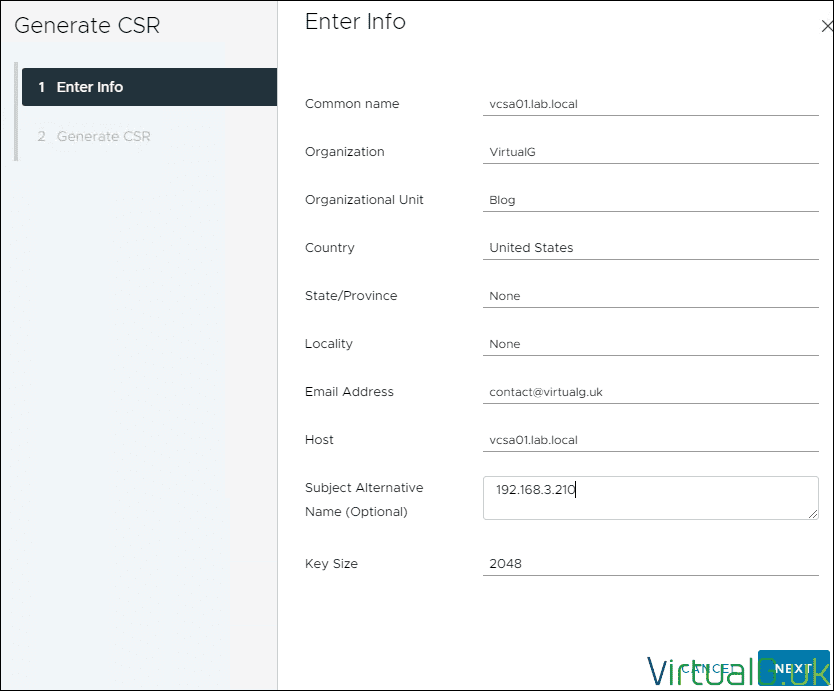
Select Next
Copy the CSR text
Sign the Certificate Request with a trusted certificate authority
In my lab, I already have a Windows certificate authority configured. I will therefore go through the steps to sign the vCenter Server (VCSA) certificate signing request with my certificate authority.
Navigate to your CA web enrolment URL. For Windows CAs this is typically: https://ca-fqdn/certsrv
Select Request a Certificate

Advanced
Enter the CSR into the request box

Submit
Depending on how your CA is configured, the certificate request might be auto-approved and displayed on the screen for you to download. If it is auto-approved, select Base 64 and download both the certificate and the chain.
If the request is not auto-approved, then you need to open the Certificate Authority MMC, connect to your CA and issue the certificate manually:

Once issued you can go to the Issued Certificates folder, double-click the certificate, select the Details tab and Copy to file.
When the export wizard opens, select Base 64 encoded
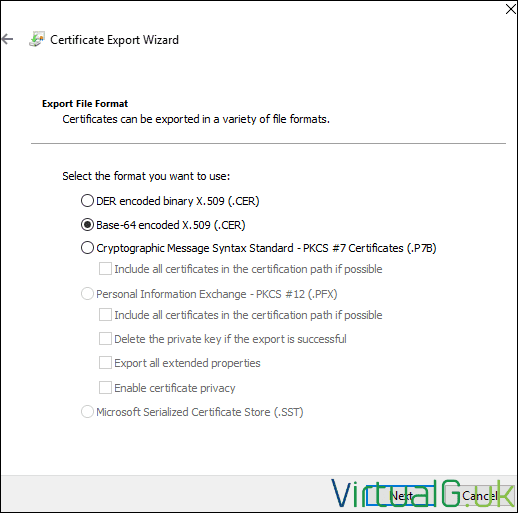
Give the certificate a name and location via the browse option. I like to name my certificates as per their FQDN with the extension .cer
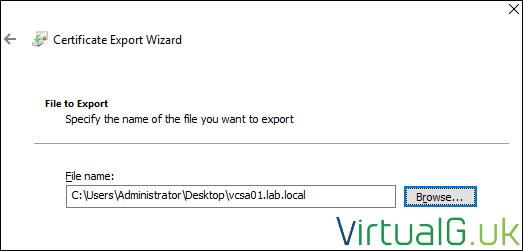
If your certificate was not auto-approved, you also need to export the root CA and any other CAs in the chain of the certificate. To do this go back to the Certificate Authority MMC, double-click your issued certificate, and select certificate path.
For each CA: Select the certificate, View Certificate, Details, Copy to File
As with the VCSA certificate follow the wizard prompts.
Ensure you select Base 64 encoded when prompted.
Give the certificate a name such as root.cer and save the certificate.
We should now have the VCSA certificate and one or more CA certificates.
Import the Signed Certificate into the vCenter Server
Back on the VCSA’s Certificate Management Page, under Machine SSL Certificate select Import and Replace Certificate
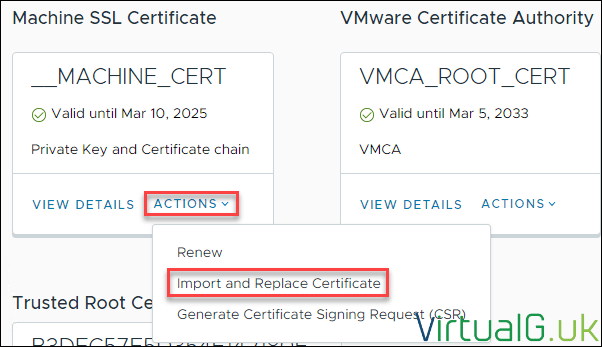
We signed the request with an external CA and generated the CSR on the VCSA, so the second option is ours, as depicted below:

Under Machine SSL Certificate browse for the VCSA certificate, we saved earlier.
For the chain of trusted root certificates, in my lab, I only have one CA in the chain, so I only need to upload one certificate. If you have multiple CAs in your chain, you need to make 1 new file with all the certificates of the CAs inside, ideally in order of the CA hierarchy.

Once you have both boxes populated select Replace. NOTE that this will restart your vCenter Server services which might be in use by other tools or administrators.
After the certificate is replaced and the VCSA services have restarted, in a new web browser window you should see the SSL certificate is now signed.
You may need to re-establish the trust between your other VMware or 3rd party solutions now that a new certificate is in place. This is usually the case for systems such as backup and monitoring.
Confirm the certificate is valid
With the certificate and chain installed, open your web browser and navigate to your VCSA via the FQDN.
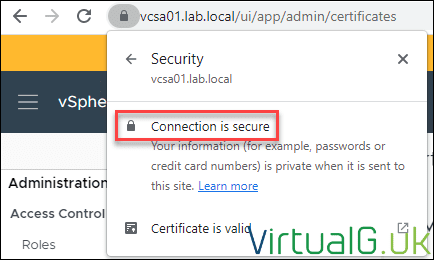
Your browser should now show your certificate as valid in the address bar.
You can further inspect your certificate by selecting it and reviewing its details





[…] The manual process to replace your VCSA SSL certificate is simplified in recent versions of the VCSA, however this is still a manual process which should be completed at least every year. If you’re interested in my article on how to manually replace your VCSA Web SSL Certificate, check here: How to manually sign your vCenter Server SSL Certificate […]