Contents
Rather than using external backup solutions, VMware highly recommend that you take a file-level backup of the vCenter Server Appliance (VCSA)
Fortunately, VMware has backup functionality of the VCSA built into the solution, meaning no external software, licenses or dependencies are required.
Backing up the VMware VCSA via VAMI
Login to the VCSA VAMI
To get started you need to login to the VCSA via the VAMI (Using port 5480)
For example: https://VCSA-ADDRESS:5480
Open the Backup page
After logging in with the root account, navigate to the Backup option on the left navigation pane.
You now have two options:
One-Off Backup
If you wish to complete a one-off backup then you’ll want to select the Backup Now link on the right side of the window.
Scheduled Backup
Alternatively, to schedule a backup, select the Configure link on the top right of the window.
VCSA 8 Backup Protocol Options
Regardless of which option you specify, you will need a file storage location configured with:
- Enough space
- Suitable security
- User authentication
This is required for the VCSA to store the backups.
In this example, I am going to set up a simple SMB share but you can also use FTPS, HTTPS, SFTP, FTP, NFS, SMB or HTTP protocols for the backups.
Setting up a Basic SMB share
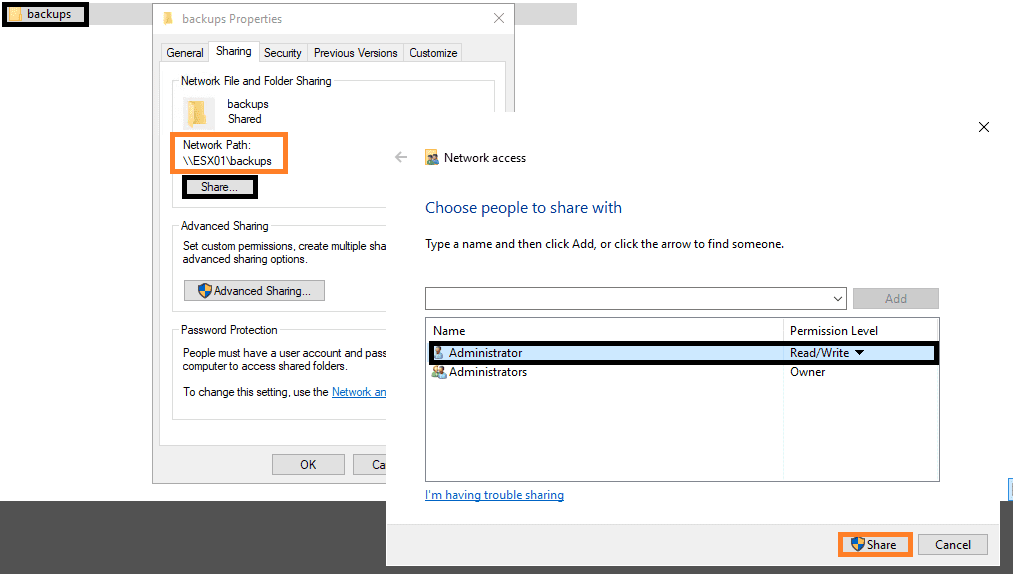
In my lab, I have created a new folder on my management server named backups.
I’ve enabled sharing on this folder and ensured that my administrator user has read/write permissions to share.
You’ll likely want to use a backup location which is physically located in a separate location from your VCSA, as per your DR/BC policies.
Creating the Backup Configuration
Now that we have somewhere to save the backups, we can continue with the backup configuration on the VCSA.
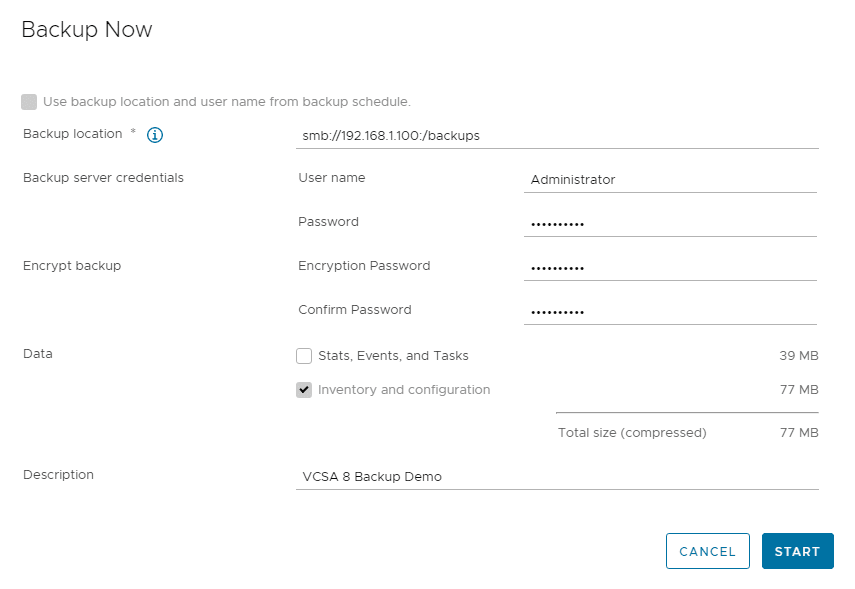
With the backup window on the VCSA VAMi open, enter the required details. My SMB configuration in the lab looks like the following:
- Backup Location smb://192.168.1.100:/backups
- User name Administrator (This is the username for the file share created earlier. You may wish to create your own dedicated backup user account)
- Password ***************
- Encryption Password *************** (This is used to encrypt the backup, obviously!)
- Data (Stats, Events, and Tasks If you wish to backup the Stats, Events and Tasks enable this, but it will take much longer to backup and consume far more space
- Description VCSA 8 Backup Demo
If you are setting up a schedule then you’ll also be prompted for the schedule and retention of the backups.
Once complete, wait for the backup to complete.
Below is an example of the files created during the backup. In my small lab, the total size of one encrypted backup was 279MB. The total backup time was only a few seconds.
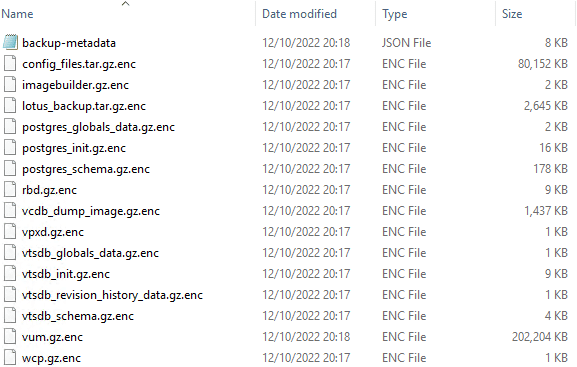
You’ll notice the .enc file format, this means that the files are encrypted.
Restoring the VMware VCSA from Backup – Stage 1
If you are using a single vCenter Server appliance in your topology (No dual Active/Passive vCenter Server HA topology) then the restore process commences with mounting the VCSA installation media ISO to your workstation.
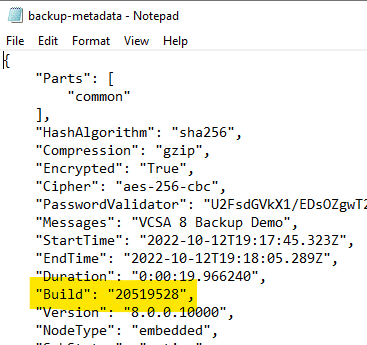
Ensure the build on the ISO is the same one as your old VCSA was using. You can check this via the backup-metadata file in your backup location:
If using Windows, Once the ISO is mounted, navigate to D:\vcsa-ui-installer\win32 where D:\ is the drive containing the ISO.
- Launch the application named installer.
- Select the Restore option
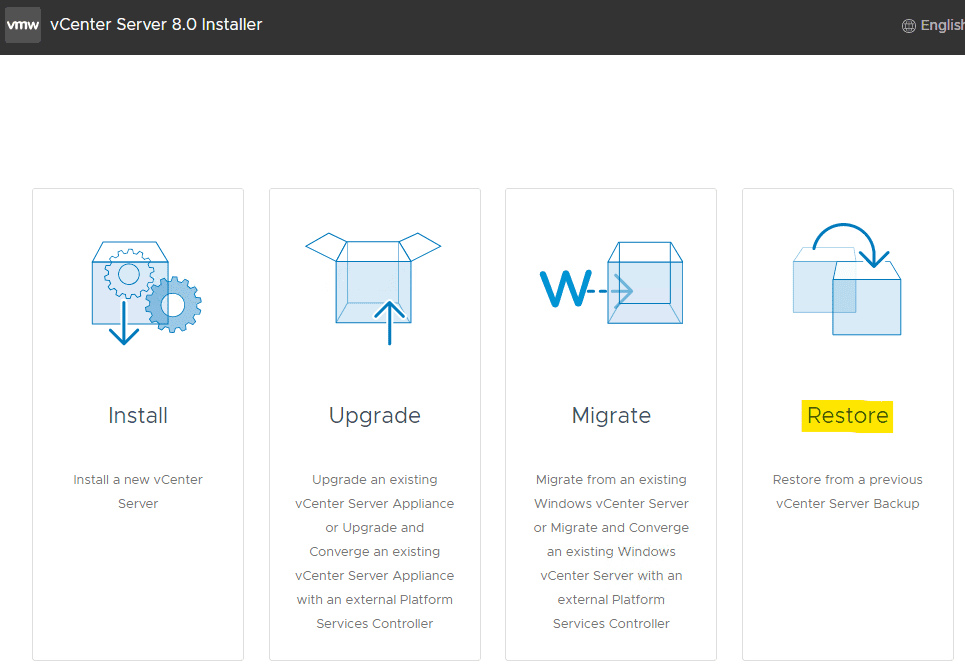
- At this stage, ensure your old VCSA is definitely powered off.
- The wizard will now proceed as if you are deploying a new VCSA, simply follow the prompts.
- When prompted for the backup details, enter as they were provided during the backup configuration. The only difference is that for the location, you need to specify the path to the backup you wish to restore. In my example it is:
smb://192.168.1.100:/backups/vCenter/sn_vcsa01.labv8.local/M_8.0.0.10000_20221012-191745_KABVGQJAHAQEEYLEMN2XAICEMVWW6===
- The metadata file within the folder will help you to choose the correct one.
- Now you can simply continue with the wizard as if it were a new deployment.
Once Restore-Stage1 is complete, a fresh appliance has been deployed. Next, we need to load in the configuration from the backup. This is completed within Stage 2.

Restoring the VMware VCSA from Backup – Stage 2

With Stage 1 of the VCSA restore complete, select continue to progress through the wizard.
At this point, you will be asked for the encryption password if specified during the backup.
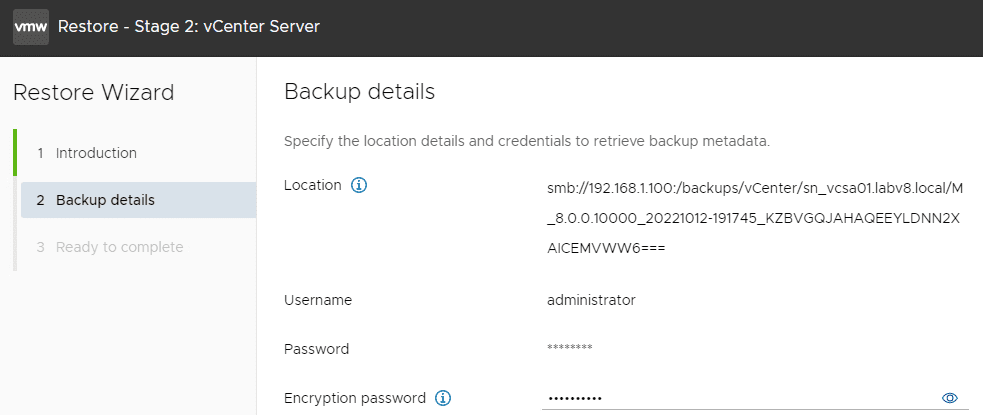
Follow the wizard to complete the restore operations.
The wizard will now restore the VCSA configuration with the data in the backup files.

That’s all, log into your VCSA and everything should be as of the time of the backup.
Note that in vSphere 8, backup and restores are now Cluster configuration centric. This means if you have added an ESXi host between the backup and restore occurring, the host should automatically be added back into the restored VCSA even if the backup files had no knowledge of it.
To read more about this and other new features in vSphere 8, take a look at my post here.
You can also subscribe to my mailing list and watch my YouTube Series on vSphere 8 here





[…] Before proceeding, ensure you have a supported and valid VCSA backup. You can find out how to set these up in my other post How to correctly Backup & Restore VMware vCenter Server (VCSA) 8 […]