Contents
Backing up your vCenter Server (VCSA) is key to being able to recover in the event of a failure. VMware provides a built-in backup scheduler in version 6.7 & 7.0 of the VCSA which is a file-level backup of the VCSA’s data. Restoring the VCSA is a simple as deploying a new appliance while specifying the backup option along with the backup file location. (NOTE: This does not backup your Virtual Machines)
Setting up the Infrastructure
This article covers how to backup the VCSA to a Linux VM, or in this case, Photon OS. Windows licenses are expensive and so with Photon OS being freely available, it’s a good solution to store your VCSA (and other appliance) backups such as switches and routers. IF you already have a secure backup service in place, then feel free to use this instead.
We won’t cover the Photon OS deployment here. There is plenty of information on the Photon OS website here: https://vmware.github.io/photon/assets/files/html/3.0/index.html
Photon OS Configuration
Login to your Photon OS VM
Create a new group
Run the following command to create a new group, I’ve named mine backup-grp
I’ve used groups so that you can create new users in the future and choose to add them to the group in order to decide if the user gets access to the backups or not.
groupadd backup-grp
Create a new folder
Now navigate to a suitable folder then create a new folder to store the backups. I’m just creating the backups folder in the root directory here
cd /

mkdir backups
Create a new user
useradd backup-usr
Set a password for the new backup user
passwd backup-usr
(specify the password when prompted)
Make the new user a member of the new group
usermod -g backup-grp backup-usr
Make the new group (and it’s members) the group owner of the backups folder
chown root:backup-grp /backups
Now give the owner (root) and the group (backup-grp) read, write and execute permissions to the folder, but no one else
chmod 770 /backups
VCSA Configuration
Now that we have everything setup on the Photon OS side, we can configure the backup schedule in the VCSA
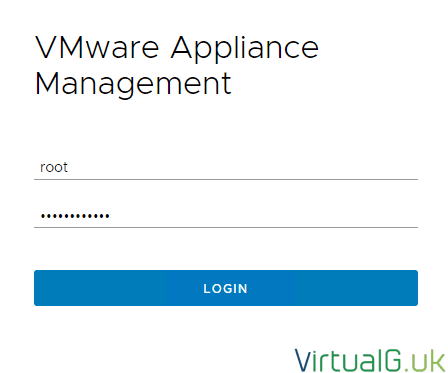
First, log in to the VCSA on port 5480
https://vcsa-fqdn-or-ip:5480
Navigate to Backup on the left pane
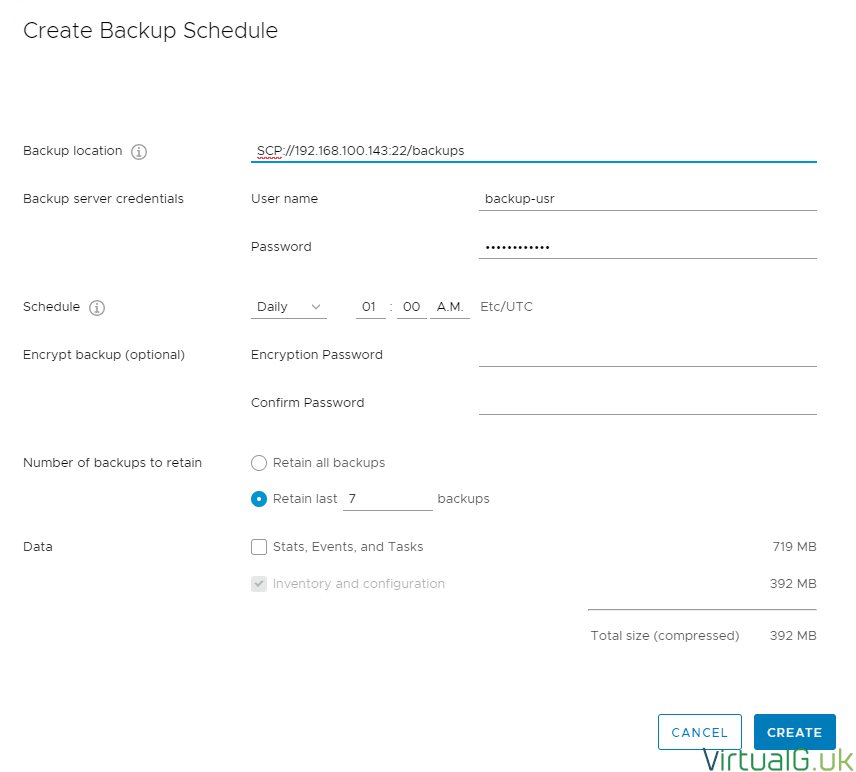
On the top right select Configure
- Backup location: Enter the Protocol, FQDN or IP address of the Photon OS VM & the SCP port & the backup directory
- So in my example, we are using SCP:// then 192.168.100.143 then :22 and /backups
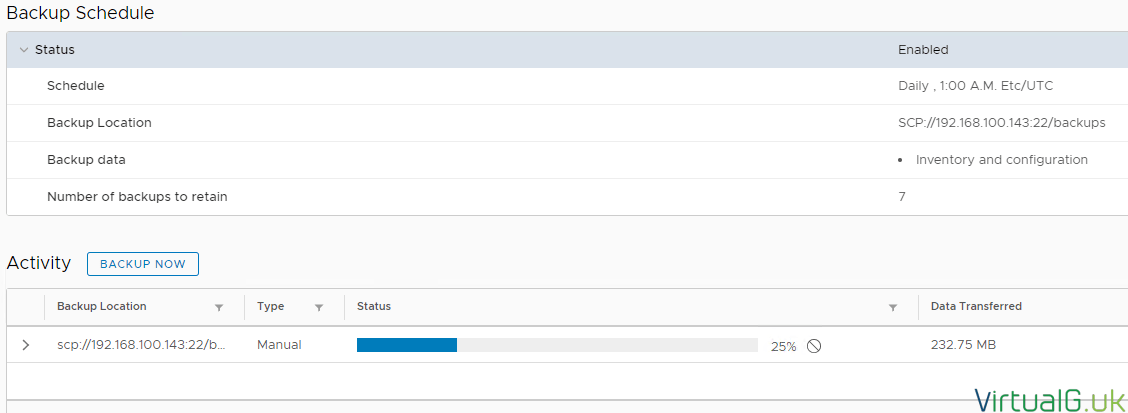
- Put it all together and you get: SCP://192.168.100.143:22/backups
- The VCSA is very particular about this format so be sure to double-check it
- User name & Password: The credentials of the backup user we created earlier
- Schedule: When you would like to backup the VCSA
- Encrypt backup: This is optional but can encrypt the backup files in case you need to for compliance purposes
- Number of backups to retain: This is going to be as per your corporate policy, I would advise setting “Retain last x backups “to a number to ensure your Photon OS VM does not run out of space. When set, the VCSA will automatically delete old backups which are outside this retention policy.
- Data: Choose whether or not to backup VCSA stats, events and tasks. I have not done in my lab to speed up the backup process and to save some space.
This window will also show you an estimated size of how large the backups will be (at the current time)
Now select Create and as long as you don’t have any errors, you are good.
If you need to get access to the files to use them for a restore, then simply use an SCP tool on your machine. If you have a Windows desktop, you can use WinSCP to login and download the backups for recovery or testing.
Testing
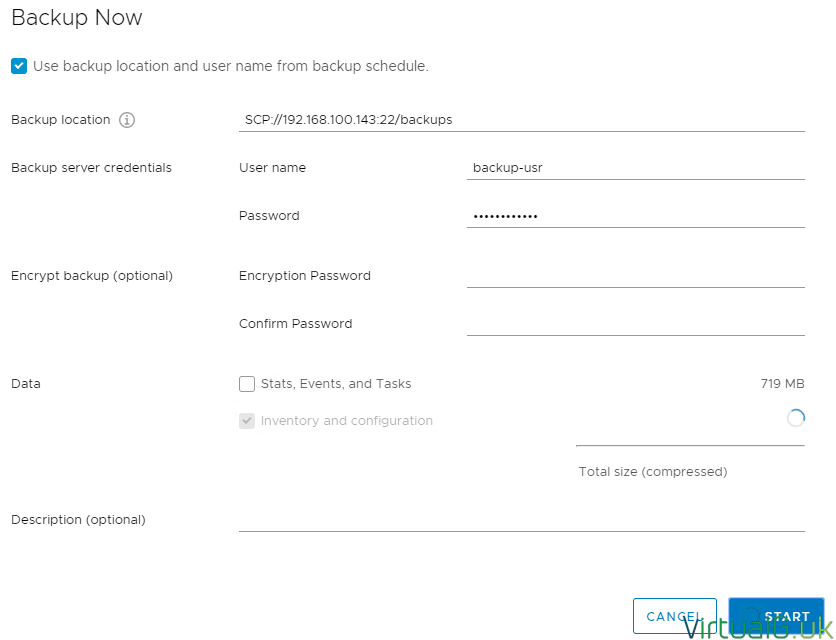
You can run a test straight away after setting up the schedule by selecting Backup Now and checking the option for: Use backup location and user name from backup schedule
You can follow the backup progress on the Backup page of the VCSA:
That’s it!


