Due to the number of blades in the environment I am configuring in this example, I will be making use of server profiles.
Server profiles allow us to set the configuration on one blade , export this configuration and apply it to multiple blades. This saves significant provisioning time and ensures a consistent configuration for all blades.
Configuring the first blade
In the FX2 CMC navigate to Server Overview > Setup > Profiles
First, you need to configure a blade with the correct configuration, then you can extract the configuration from it and create a profile that you can then apply to other blades.
Basic FX2 Configuration
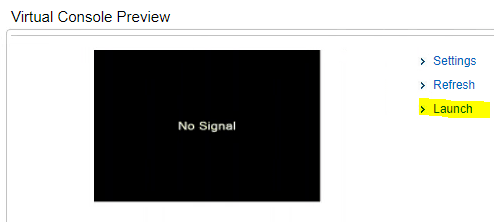
Boot one of the blades into BIOS Setup. To do this open the iDRAC interface for the blade and launch the console.

On the top navigation bar select Next Boot > BIOS Setup
Power on or Power Cycle the blade
Once the BIOS Setup is launched, you need to configure the settings as required.

In this example I made the following changes
Device Settings
Embedded NIC 1 Port 1 Qlogic.
If you have the Intel NIC, then you are limited to 1Gb/sec and cannot virtualise the NIC. If this is the case and you need to provision storage to the blade via FC and have Networking capabilities too, then you need to change the Intel CNA to the Qlogic one. Speak to your Dell EMC Rep about how to order the QLogic NICs. They are easilly replaced with a screwdriver but you need the QLogic part.
- Device Level Configuration > Virtualization Mode > NPar (This enables virtualization of the NIC) – Required if you require Network and FC connectivity down the CNA
If you require a single NIC to the ESXi host (Per IO Module, so 2 in total, then make one partition in NIC mode. Likewise, if you need one FC port per IO module, then make one FCoE partition here) Here you will see the term FCoE used, FCoE is used internally in the system to vrtualise the NICs, this is translated to pure FC later for connectivity to your MDS.
- NIC Partitioning Configuration > Partition 1 Configuration > NIC Mode enabled (All others disabled)
- NIC Partitioning Configuration > Partition 2 Configuration > FC0E Mode enabled (All others disabled)
- NIC Partitioning Configuration > Partition 3 Configuration > All disabled
- NIC Partitioning Configuration > Partition 4 Configuration > All disabled
To ensure at least 50% of bandwidth available to each of the configured partitions, you need to setup a QOS policy. The FX supports egress only at this point so set a minimum percentage of bandwidth to guarantee to each partition on this NIC
- NIC Partitioning Configuration > Global Bandwidth Allocation > Partition 1 Minimum TX > 50%
- NIC Partitioning Configuration > Global Bandwidth Allocation > Partition 1 Maximum TX > 100%
- NIC Partitioning Configuration > Global Bandwidth Allocation > Partition 2 Minimum TX > 50%
- NIC Partitioning Configuration > Global Bandwidth Allocation > Partition 2 Maximum TX > 100%
Finish
And complete the configuration for the other QLogic NIC:
Embedded NIC 2 Port 1 Qlogic
- Device Level Configuration > Virtualization Mode > NPar
- NIC Partitioning Configuration > Partition 1 Configuration > NIC Mode enabled (All others disabled)
- NIC Partitioning Configuration > Partition 2 Configuration > FC0E Mode enabled (All others disabled)
- NIC Partitioning Configuration > Partition 3 Configuration > All disabled
- NIC Partitioning Configuration > Partition 4 Configuration > All disabled
- NIC Partitioning Configuration > Global Bandwidth Allocation > Partition 1 Minimum TX > 50%
- NIC Partitioning Configuration > Global Bandwidth Allocation > Partition 1 Maximum TX > 100%
- NIC Partitioning Configuration > Global Bandwidth Allocation > Partition 2 Minimum TX > 50%
- NIC Partitioning Configuration > Global Bandwidth Allocation > Partition 2 Maximum TX > 100%
Finish, and exit the GUI to save the configuration and reboot
iDRAC configuration
I would also go through all options on the iDRAC GUI for the blade, including Server > Alerts to ensure that all of this configuration exists in the server profile before we apply it to other blades.
Server Profiles
In the FX2 CMC navigate to Server Overview > Setup > Profiles
Select View next to the blade you have just configured
![]()
After around a minute the profile will be displayed. Ensure you are happy with the config before continuing.
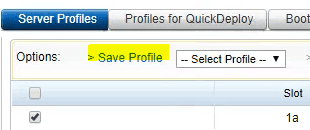
Go back to the server profile page. Select the server and hit save profile

Enter a profile name and select save It may take a few minutes to create the profile. Refresh the page if it doesn’t show up in the “Stored Profiles” Section
To apply the profile to other servers in the chassis, select the checkbox next to each one and on the dropdown choose the profile to apply and select “Apply Profile”
This will reboot the servers that you are applying the profile to.


