Contents
Puppet is a great automation tool for managing all of your Virtual Machines. Puppet Open Source is free and supports the management of most operating systems from Windows, Linux and Mac. This post guides you through the installation and shows how to create a basic configuration to get started with managing your virtual machines. Puppet also has many bolt-ons which enables you to use Puppet with VMware, helping you to automate the management of everything in the datacenter.
Installing Puppet Open Source Server
Prerequisites
I’m using a new CentOS 8 VM to deploy the puppet server. You can use other operating systems but you’ll need to adjust the steps below to suit.
First, ensure you have the following setup on your CentOS server:
- Static IP address
- Hostname
- Correct DNS server(s) configured
- NTP configured
- Another VM to test puppet with (An agent VM)
Install Puppet Server
For CentOS 8, we need to install the correct repo for Puppet 7:
sudo rpm -Uvh https://yum.puppet.com/puppet7-release-el-8.noarch.rpm
Next, install the server software:
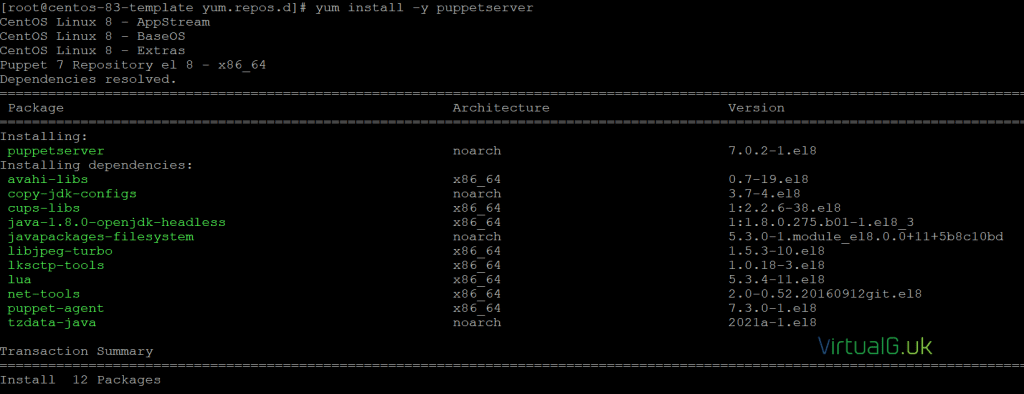
sudo yum install -y puppetserver
Once puppet is installed, ensure it is configured to start on boot
sudo systemctl enable puppetserver
Run the following to configure the puppet server
source /etc/profile.d/puppet-agent.sh
And start the server
sudo systemctl start puppetserver
You can restart it with the below command if required
sudo systemctl restart puppetserver
Puppet Agent Installation
On your test VM, we will now install the puppet agent and connect it to the puppet server.
Setup the puppet repo:
sudo rpm -Uvh https://yum.puppet.com/puppet7-release-el-8.noarch.rpm
Install the puppet agent:
sudo yum install -y puppet-agent
Source the puppet script to configure the system after install:
source /etc/profile.d/puppet-agent.sh
Set the puppet server with the following puppet command:
Replace puppet.lab.local with the hostname of your puppet server, ping it first to be sure it resolves to an IP address
puppet config set server puppet.lab.local –section main
If you get a “No route to host” error, then ensure the VM can resolve the DNS name you specified above for the puppet server. Also, ensure that port 8140 is open on the puppet server.
You can open TCP port 8140 on the puppet server as follows:
Be aware that this might need to be changed, depending on your security requirements and firewall configuration
sudo firewall-cmd –zone=public –permanent –add-port=8140/tcp sudo systemctl restart firewalld
You should get an error stating that you need to sign the SSL certificate for the agent VM.
To sign the certificate, on the puppet server run the following command
Replace centos-vm-1.lab.local with your agent VM’s name
puppetserver ca sign –certname centos-vm-1.lab.local
Looking back on the agent VM, you should see that the SSL certificate has been signed.
If you do not see this, just run the command again:
puppet config set server puppet.lab.local –section main
Creating puppet packages for deployment
Here we will create a puppet package and link it to our agent VM. This will demonstrate the power and core features of puppet.
The chrony example
For this example,we are going to use puppet to ensure that the time is synced up to NTP servers. CentOS 8 uses chrony for this rather than the older ntpd service
Once you have this example working, you can use it as a baseline for other things that you want to manage with puppet.
Ensure chrony is not installed
First check that chrony is not installed on the CentOS VM. It probably is, so remove it for the demo.
sudo systemctl status chronydsudo dnf remove chrony
A note on environments
You can and should make other environments and store different configurations in different environments.
IMPORTANT: On the agents, for this example to work, ensure you place them in the production environment. If you have created other environments, then reflect that change in the command below:
On your client/agent VMs edit your puppet configuration file as required:
vi /etc/puppetlabs/puppet/puppet.confcertname = centos-vm-1.lab.local
runinterval = 1h
environment = production
Puppet manifest files
With your agents now in the production environment, we can create a config to push to them.
Use vi or another editor to create a file named chrony.pp with the below contents (changing the NTP server pool config as required)
Since we have placed our agent VMs in the production environment, you’ll want to save the file in the production manifests folder for this example: /etc/puppetlabs/code/environments/production/manifests/chrony.pp
# Class Definition
class chrony {
# Ensure chrony is installed
package {“chrony”:
ensure=> “present”,
}
# Ensure NTP configuration is correct
file {“/etc/chrony.conf”:
ensure=> “present”,
content=> “pool 0.uk.pool.ntp.org”,
}
# Ensure chronyd service is running
service {“chronyd”:
ensure=> “running”,
}
}
# Declare Class
include chrony
As you can see, this will:
- Ensure chrony is installed
- Ensure a chrony configuration file exists
- Ensure a config entry for the correct pool exists
- Ensures that the chronyd service is running
Save the file
Check for syntax errors with:
puppet parser validate /etc/puppetlabs/code/environments/production/manifests/chrony.pp
Apply the configuration in noop mode
Next, run the puppet command on the agent VM to test what would happen without actually changing anything. You could, of course, use a new “testing” environment, instead of saving the file earlier directly in the “production” environment.
This would be my suggestion if you are going to use puppet in a real-world scenario as you would want to test the configurations before putting them into the production folder.
This command will force the agent VM to get the latest configuration and apply it in NOOP mode, meaning that it will test to see what would happen if you were running it for real
Note that the –test option here, means do it now rather than wait for the schedule to kick in. It has nothing to do with testing, it’s just used to force the command tor un now.
puppet agent –test –noopYou will see that our config would have been applied because the status was different for more than one element of the configuration
Now we can run the command for real, to update our clients (agent VMs) with this configuration:
You can of course, just wait for the scheduler to run and update automatically (every 30 minutes by default)
puppet agent –testYou should see that it has been applied successfully.
Also, note here that it was applied to the production environment
Now check to see if chrony is installed and running:
sudo systemctl status chronydAnd that’s all we need to do.
Some other notes
For other manifest configurations, just save them in the correct environment folders and let the built-in puppet scheduler apply them.
Be sure the first save them in a “test” or “staging” environment and run them in a testing mode on an agent before rolling them out to every other server in your network!
If your agent is linked to the “production” puppet environment but you want to test the agent VM against a manifest in a “testing” environment, then on the agent you would run:
puppet agent –test –environment testing –noop
If you omit the –environment option, then the command will run with whatever environment the system is assigned to.
To find the environment that a test is assigned to, you can check and change it in the puppet configuration file on the agent VM as we did above
vi /etc/puppetlabs/puppet/puppet.conf
In the next post, we will explore how to configure VMware to work with Puppet so that we can automatically provision new VMs.
Be sure to subscribe to be alerted of new posts on the blog and for the weekly newsletter


