Contents
vRealize Suite Lifecycle Manager is VMware’s solution to deploy, configure and upgrade the vRealize solution stack:
- vRealize Operations
- vRealize Automation
- vRealize Business for Cloud
- vRealize Log Insight
Typically you would install each of the vRealize solutions separately, management of this and patching/upgrading is time-consuming so a dedicated solution to manage all of this for us is most welcomed.
In this post, we will use the vRealize Easy Installer to deploy vRealize Suite Lifecycle Manager (VRLCM) which will, in turn, be able to deploy and manage vRealize Automation, Log Insight, Operations Manager etc.
Before we begin, note that you’ll need a VMware vRealize Cloud Suite license.
Downloading the vRealize Easy Installer
Much like the VCSA, the deployment of VRLCM is via a simple wizard; vRealize Easy Installer
The installer is available from https://my.vmware.com
Preparing the environment
As with the deployment of any solution, ensure you have appropriate DNS A and PTR records in place for the desired hostname for the VRLCM appliance.
You will also need to make available at least the following for VRLCM
You’ll need additional resources for the vRealize components such as vRealize Automation, Log Insight and Operations Manager, depending on what you want to deploy later
- 6 GB memory
- 2 vCPUs
- 78GB Disk space (if using thick provisioning)
You can find more information about supported solutions and other requirements here
I also recommend reading this short KB before commencing as I’ve been hit by it multiple times: https://kb.vmware.com/s/article/78541
Launching the vRealize Easy Installer
- Once downloaded, mount the ISO and open the vrlcm-ui-installer folder
- Open the correct folder for your system (win32 in my situation)
- Find and launch installer.exe
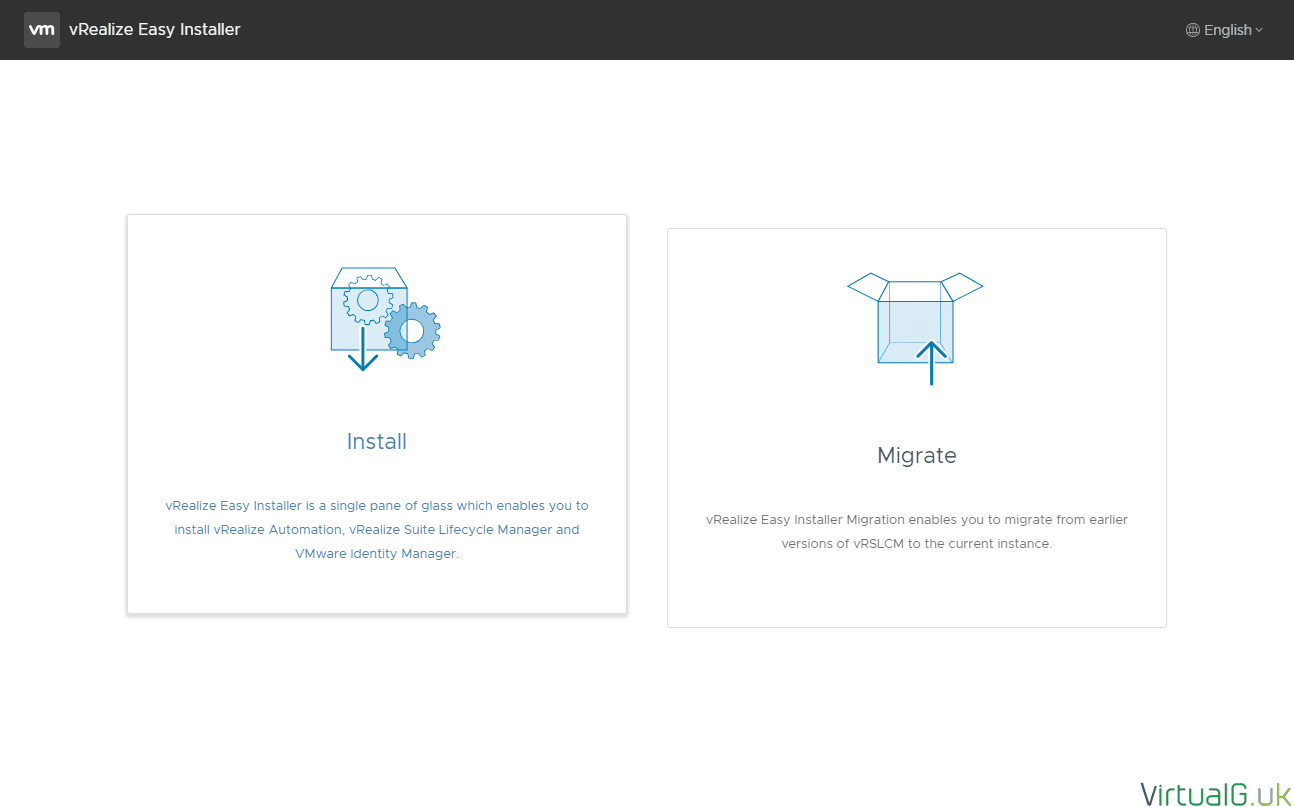
Select Install
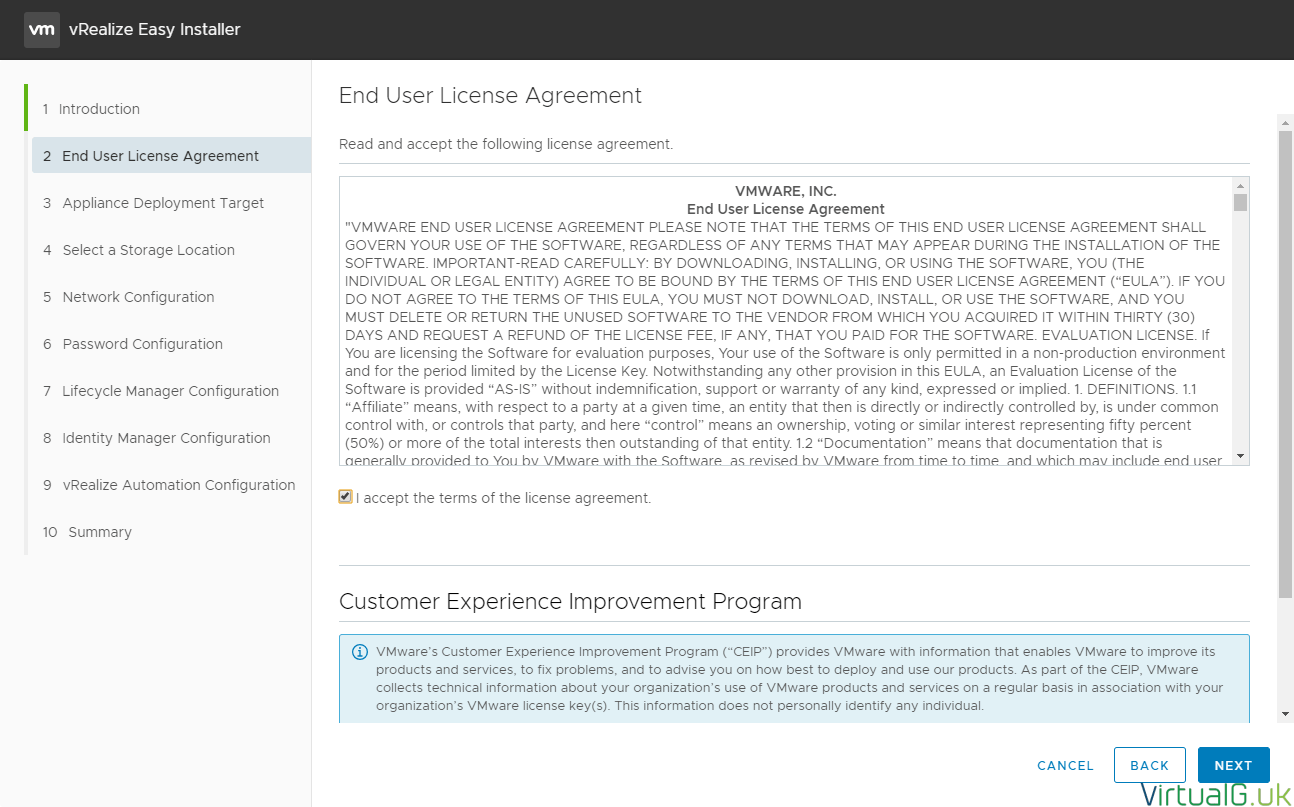
Read the Introduction & Accept the EULA
Enter the vCenter Server details which you wish to deploy the VRLCM appliance to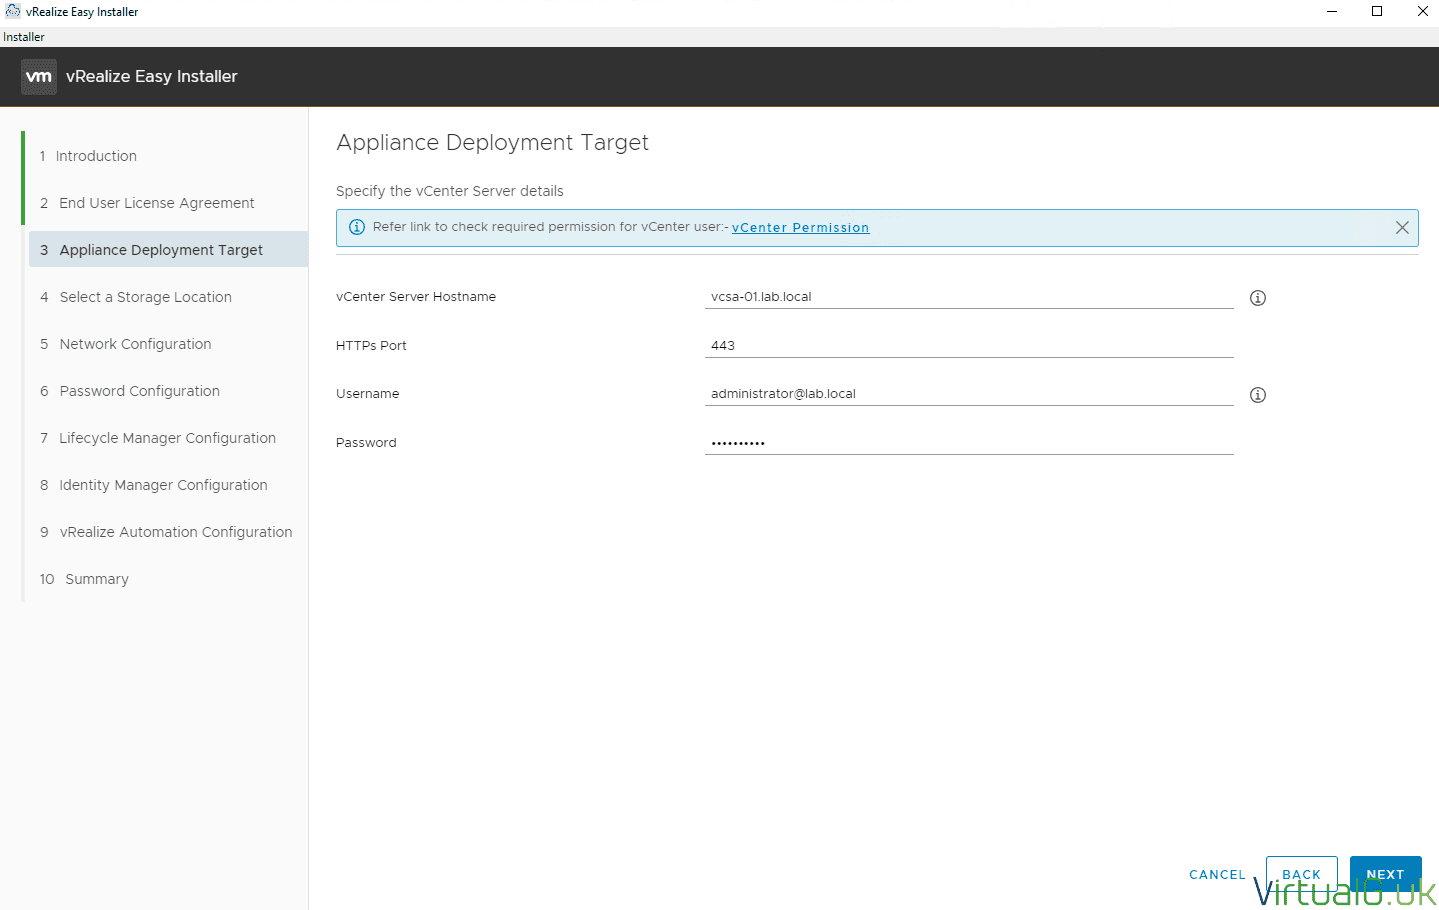
Accept the SSL warning prompt
Choose a target data centre or folder without your vCenter Server
Select a cluster to deploy to
Choose a datastore with at least 75GB free space.
Optionally enable thin disk mode to provision the VRLCM appliance with thin provisioning
Enter the core network settings which will be used to deploy VRLCM and all other products later. Add A and PTR records to DNS as required.
Specify a password that will be used as the default password for all components & accounts listed at the top of the page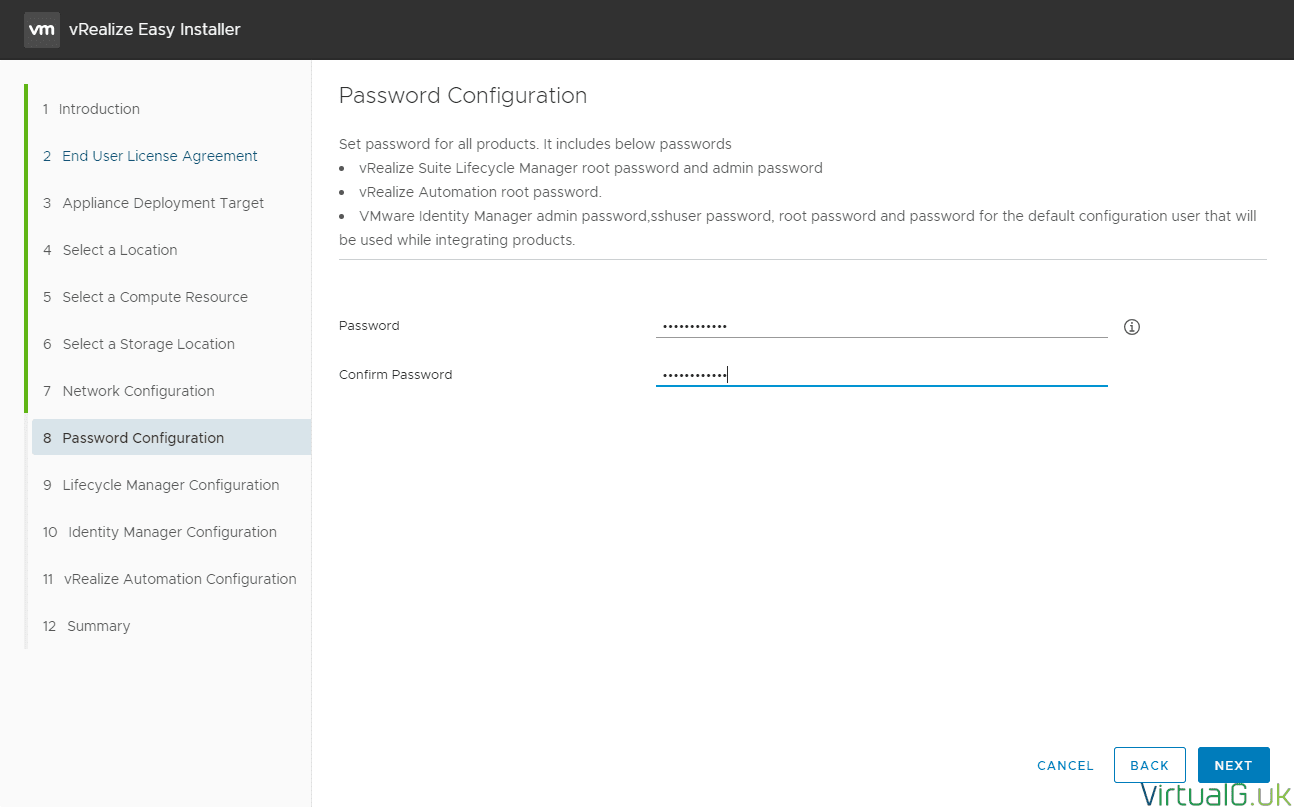
For the VRLCM configuration, enter VM name, IP address and hostname (Ensure these are added to your DNS server as A and PTR records). The other settings are optional at this stage but can be entered as desired.
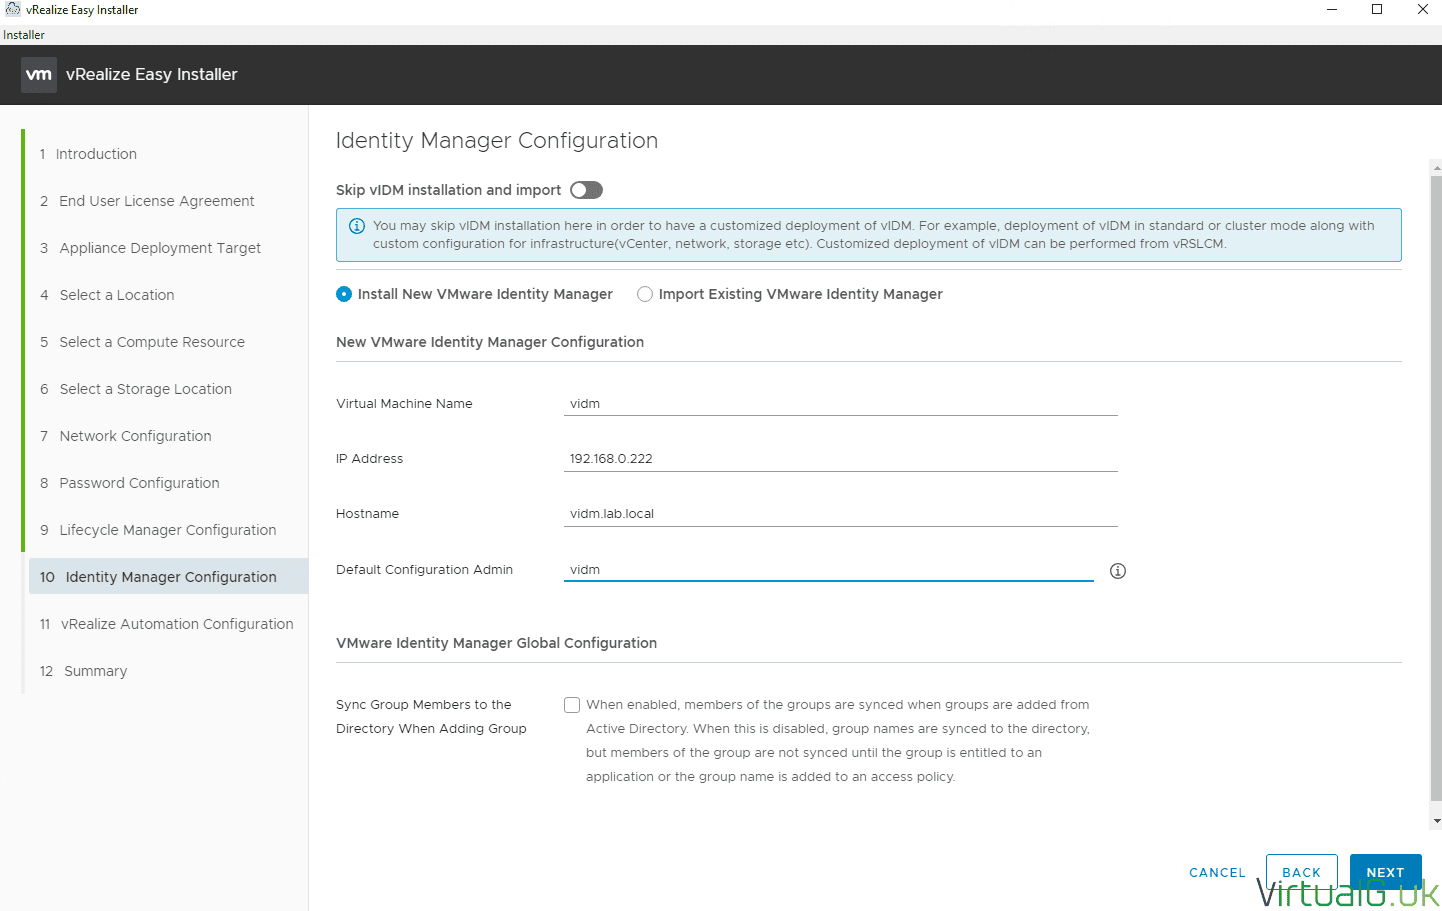
Setup identity manager here or choose to skip now and deploy a custom version later
If you wish to deploy vRealize Automation, you will need Identity Manager installing either now or later via the VRLCM UI
I will be deploying Identity Manager as part of this demo.
If you wish to deploy it now, enter the required details for deploying the VMware Identity Manager appliance, ensure your DNS A and PTR records are in place.
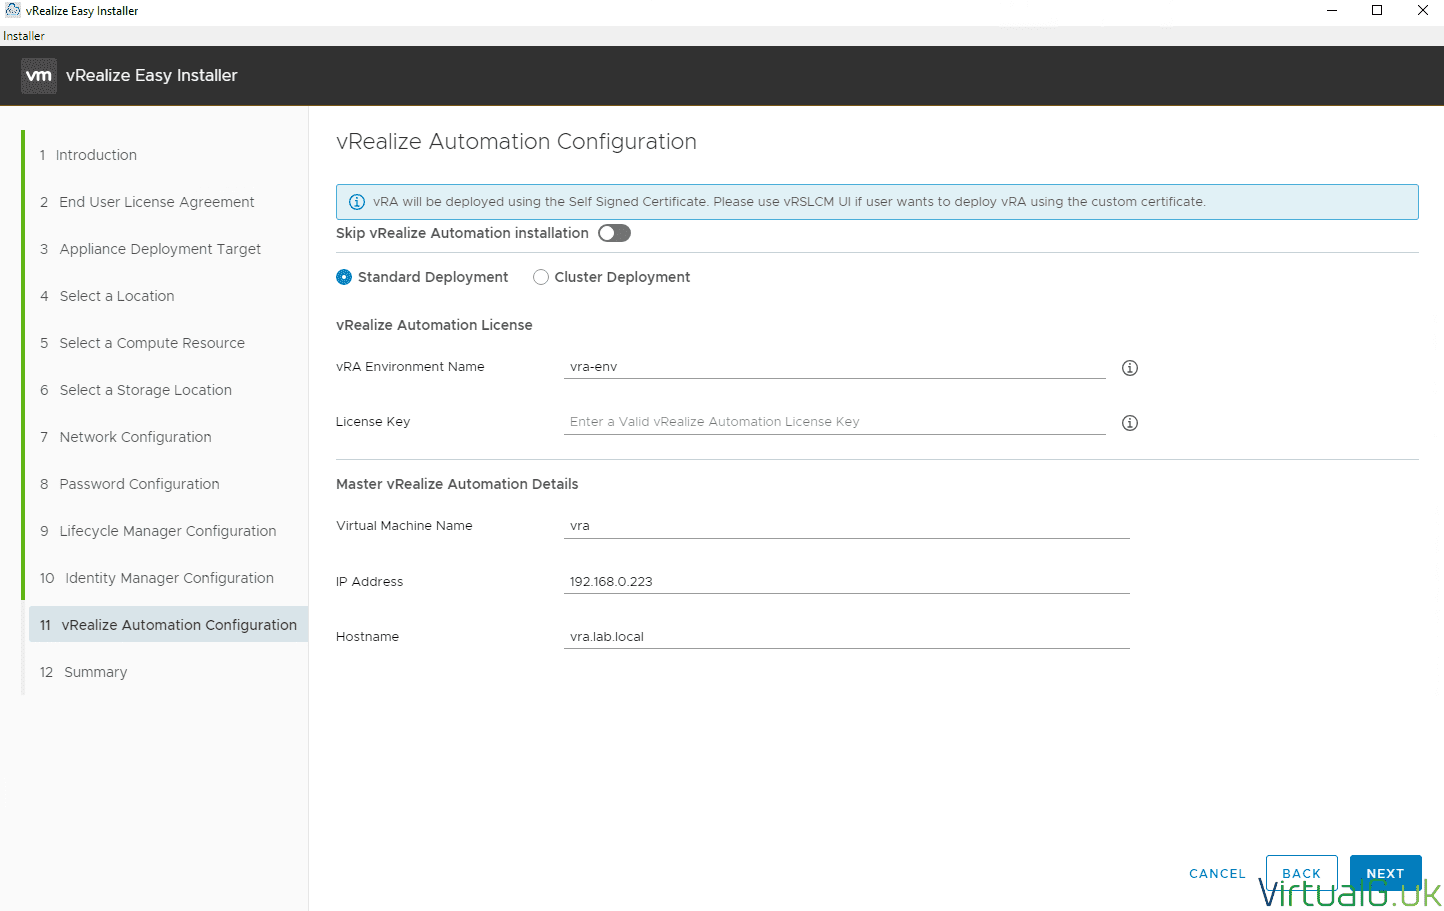
Finally, enter the required details for the vRealize Automation virtual machine, ensuring once again that all records are stored within DNS.
Review the summary and hit submit to commence the deployment.
You can monitor the progress of the installation from the installer UI.
If you encounter any issues through the deployment process, you can review the log at the location displayed.
Managing vRealize Lifecycle Manager
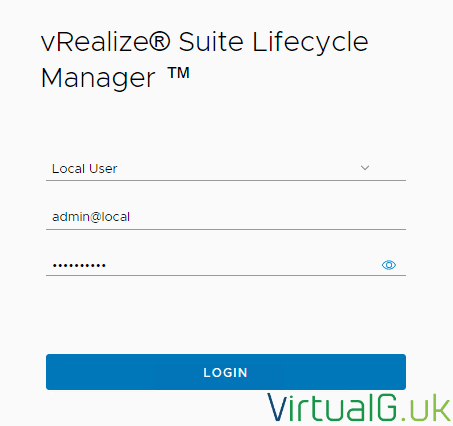
Once vRSLCM is deployed, you can log in to. Use the username admin@local and the password you set earlier.
Common Deployment Issues
VRA VM does not deploy “No host is compatible with the virtual machine”
In my lab, my hosts are limited to low cores per socket. The VRA VM will need 12 cores to deploy successfully. If it failed, you will see an error in the vSphere client as below:
If this is the case, edit the VRA VM to reduce the core count and power back on the Virtual Machine
Log into the Lifecycle Manager VM.
You’ll be able to retry the deployment. To do this, open the Dashboard, click the request that failed.
From here you can select the stage that failed “Error Details” and hit the retry button.
Ensure you set “Delete VM” to false, to ensure the existing VM is used.
Upgrading vRealize Lifecycle Manager
Once the environments and solutions are deployed, you would consider upgrading the system.
To check for updates, log in to your VRLCM system with the default admin@local user account. USe the password you created at the time of installation.
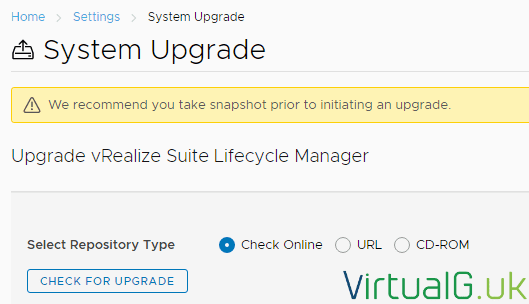
Once you are logged in, navigate to System > System Upgrade (Or Lifecycle operations > Settings > System Upgrade if you are running a later version)
Here, you can specify a URL or CD-ROM. However, if the system has internet access, you can use this as the easiest option.
Select your desired repository type and hit Check for Upgrade
Once the check completes, any available versions will be displayed.
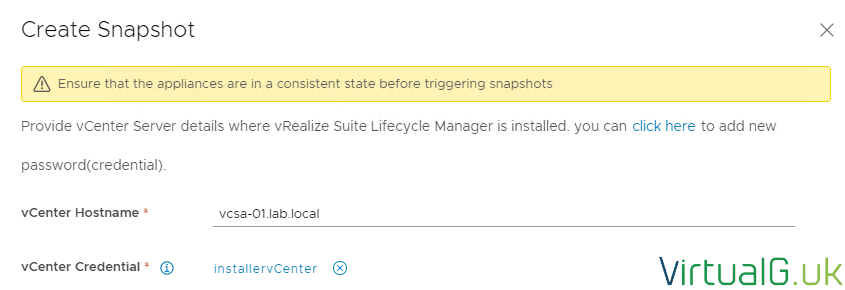
Hit the Create Snapshot button before continuing any further. VRLCM should have connectivity to your vCenter Server so it has the ability to create snapshots without having to manually log in and create them!
Once the snapshot is created, you can proceed with the upgrade.
You’ll start to see the upgrade packages getting downloaded immediately.
After successful completion of the system upgrade, you’ll be able to log back in.
Renaming a VRLCM environment
As you’ll see in the UI under Lifecycle Operations > Environments you can create environments, each containing a mixture of different vRealize solutions. These can all be deployed in the same vCenter server or in different ones.
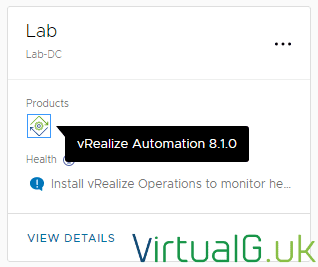
After the deployment process, I rename my VRA Environment to “Lab” as I’m going to deploy a series of vRealize solutions into my lab, in conjunction with vRA which we deployed earlier:
Deploying vRealize Operations Manager using Lifecycle Manager
In the Lab environment, I only have vRA deployed, so let’s also deploy vRealize Operations by using VRLCM.
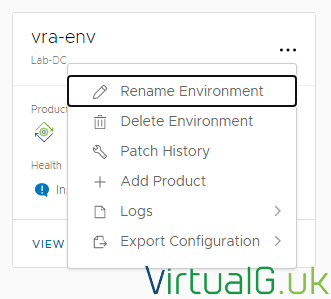
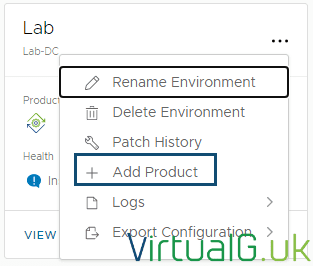
Select the 3 dots on the target environment and then add product
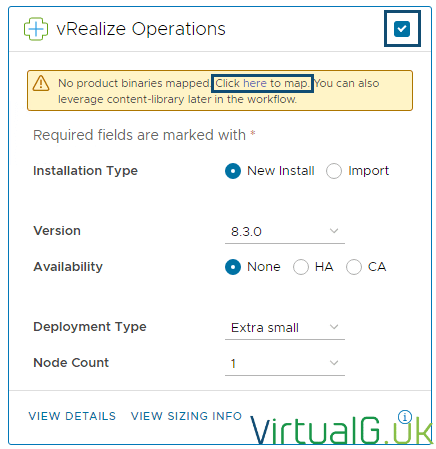
Select the checkbox on the top right of the vRealize Operations box (or whichever product you wish to add) You can select more than 1 product as required.
In this demonstration, you can see that there is no product binary mapped within VRLCM, hit the here link to do this.
On the Binary Mapping page, select Add Binaries and then select the desired location type to where the product binaries are located. For most customers, this will be from My VMware.
To use My VMware, you’ll need to hit the Click here link under the top banner to add a VMware account.
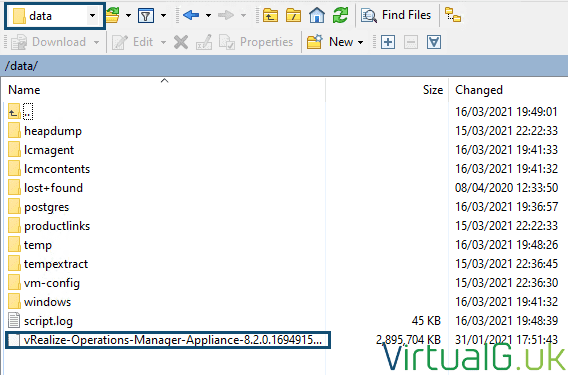
If you need to upload binaries (.ova files) from another location, then download them and upload them via a tool such as WinSCP to the /data folder (or subfolder) on the VRLCM VM.
Then specify Local and the path to the folder the binary is located such as /data in this demonstration.
Back on the VRLCM UI, hit the Discover button to load up supported products in the bottom pane.
Select the products to add and press the Add button.
Now press the click here link to be redirected to the add binary mapping task status.
Once the add product binary task is complete, go back to adding a product to the environment.
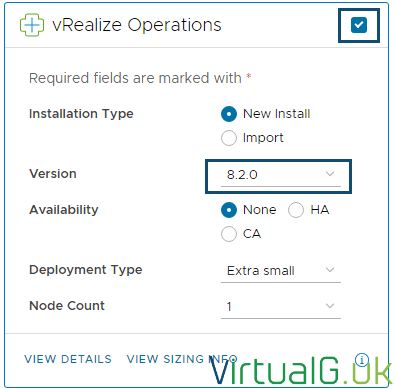
Now that vRealize Operations (8.2.0) in this case has been added as a binary, you can select it. Don’t forget to hit the top right checkbox and the correct version from the dropdown.
Choose your other deployment options and then Next
Now simply follow the wizard as you would for any deployment:
Licensing: You’ll need to Add a license, then hit the Select button to choose it. Finally, press Validate Association to add it to the deployment.
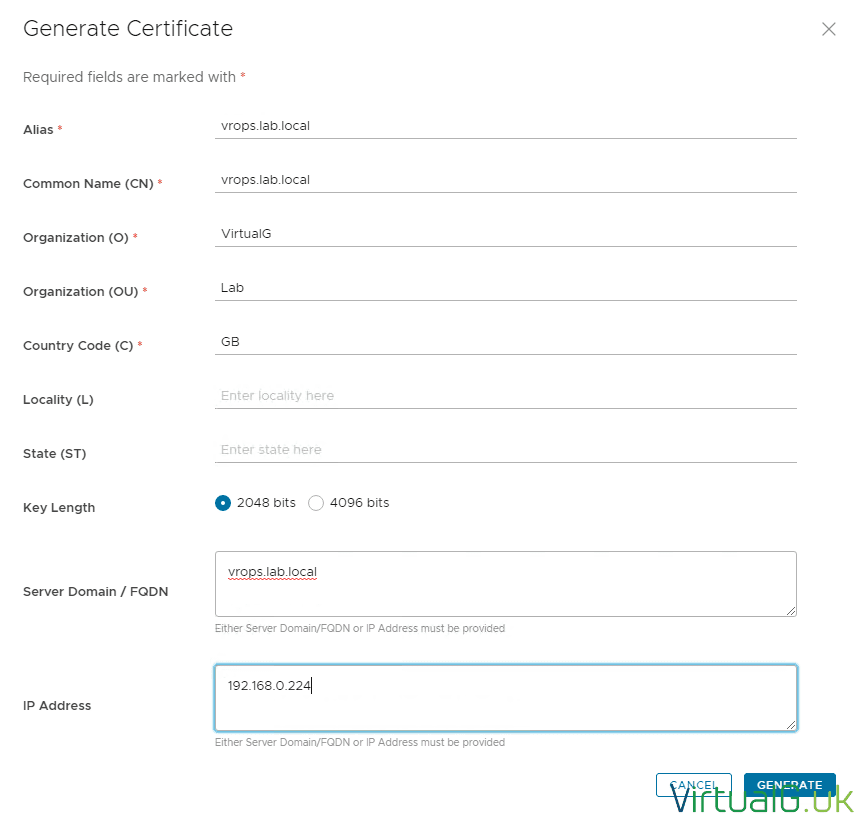
Next, you’ll need to either import a certificate or create a new one. In this demonstration, we’re simply going to create one.
Once generated, select it from the dropdown and move onto the next page.
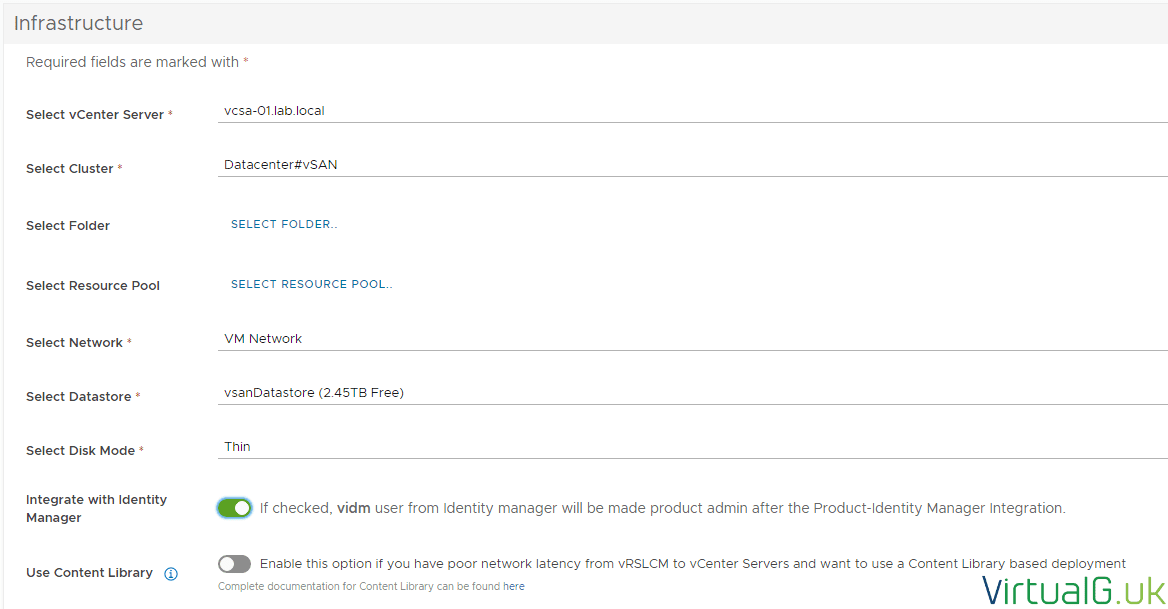
On the Infrastructure page, enter your typical deployment options.
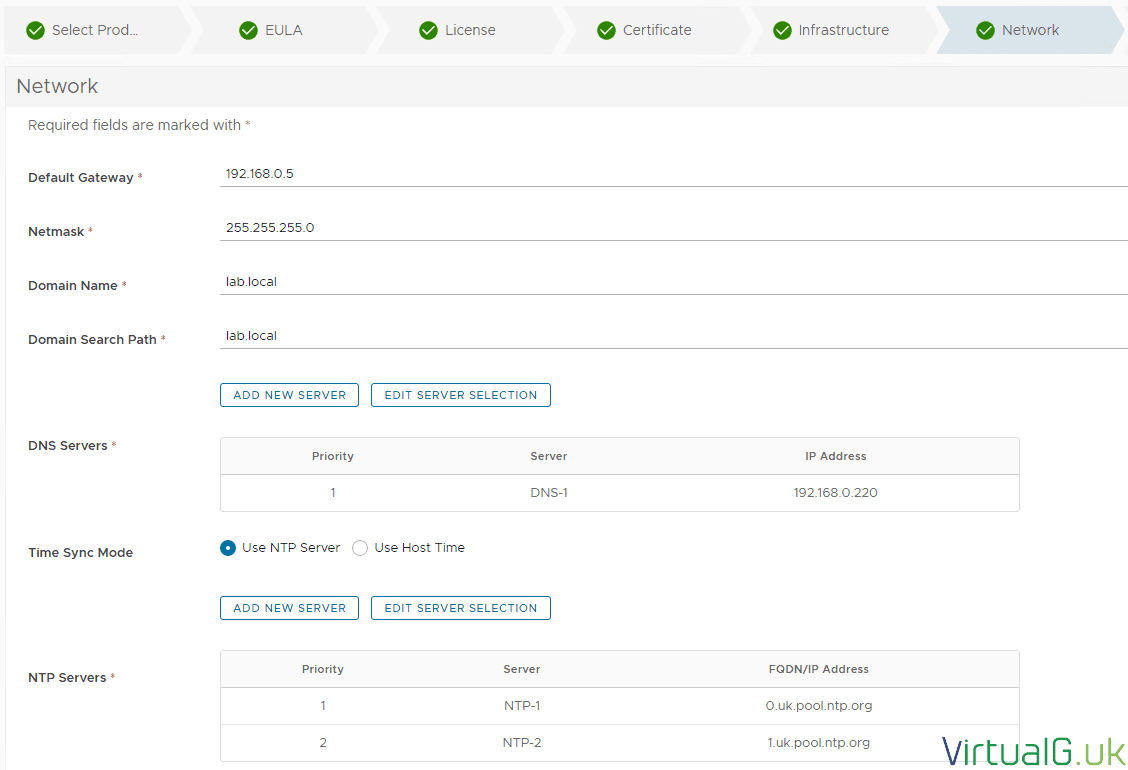
For the Network options, enter as required. Note that the installer tries to make things easy by suggesting the common network values as used n the VRLCM deployment earlier.
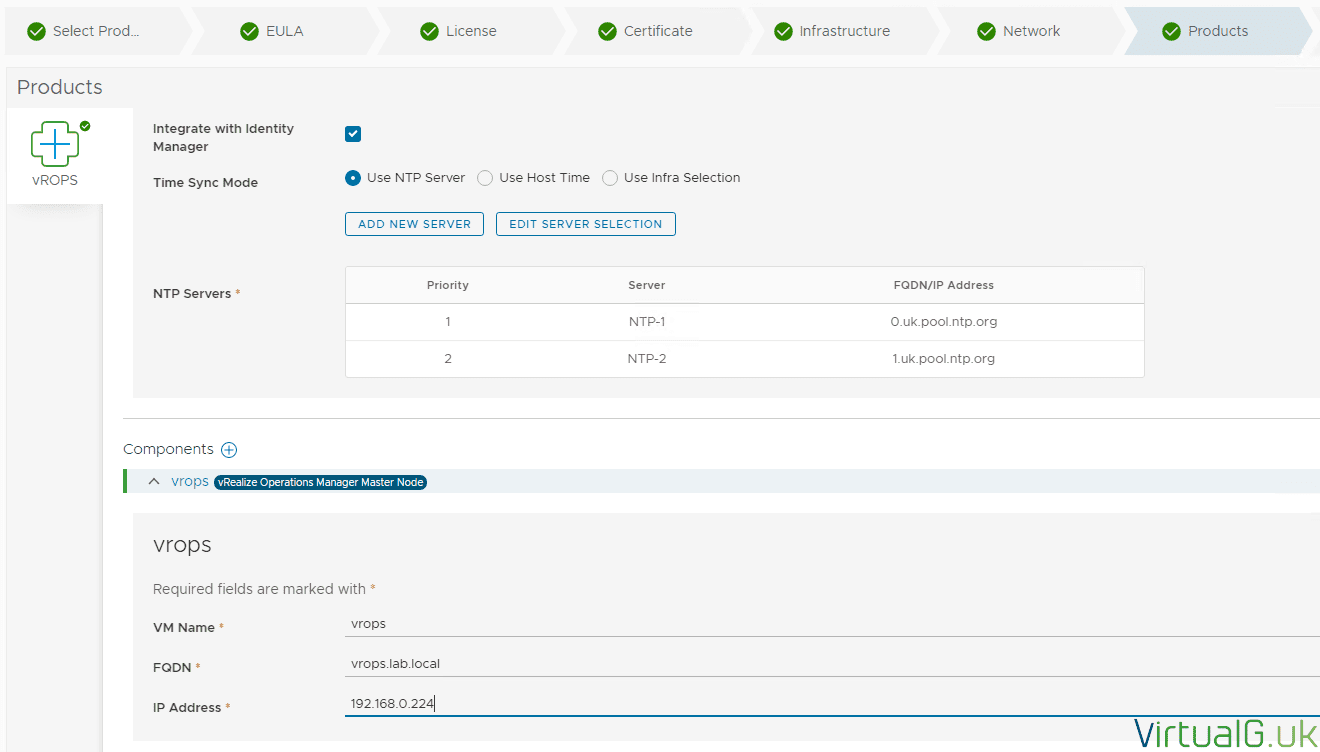
On the Products page, enter the product specific information such as VM Name, FQDN etc
Finally, run the precheck.
This will validate things like DNS & VM name conflicts prior to actually deploying the product.
On completion of the checks, complete the wizard and watch the deployment process in the VRLCM UI
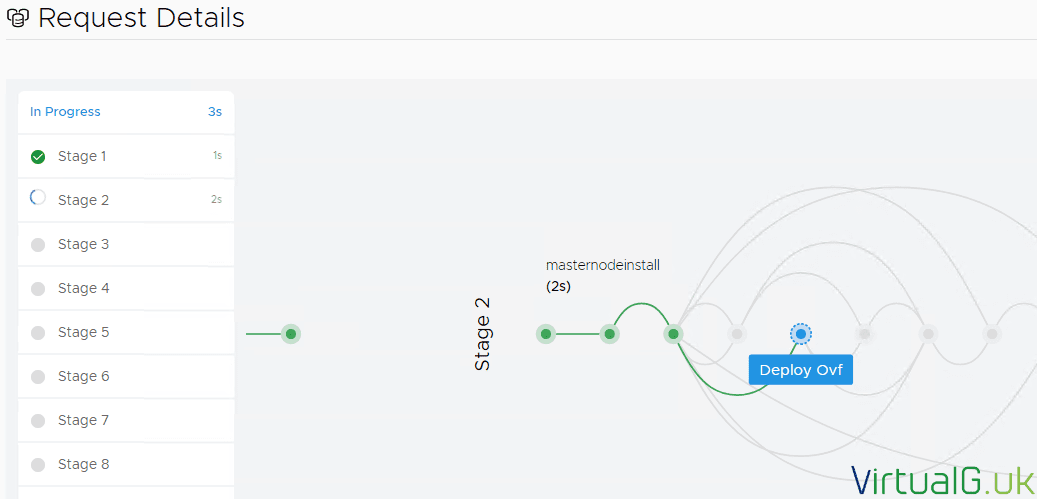
If you encounter invalid password issues at stage 2, you can add new passwords to the system from the bottom left icon:
After adding a new password, you can retry the installation by selecting Error Details and specifying the new password, followed by Submit.
With Operations Manager now deployed, we can use the product as usual.
Patching vRealize Components with vRealize Suite Lifecycle Manager
The power of Lifecycle manager comes in when we want to patch a bunch of environments.
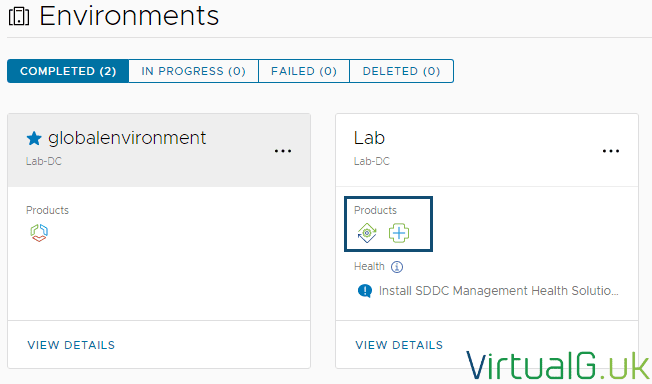
Go back to the Environment page and see the products listed under each environment.
Select View Details under your environment.
Here you can see products listed along the top row
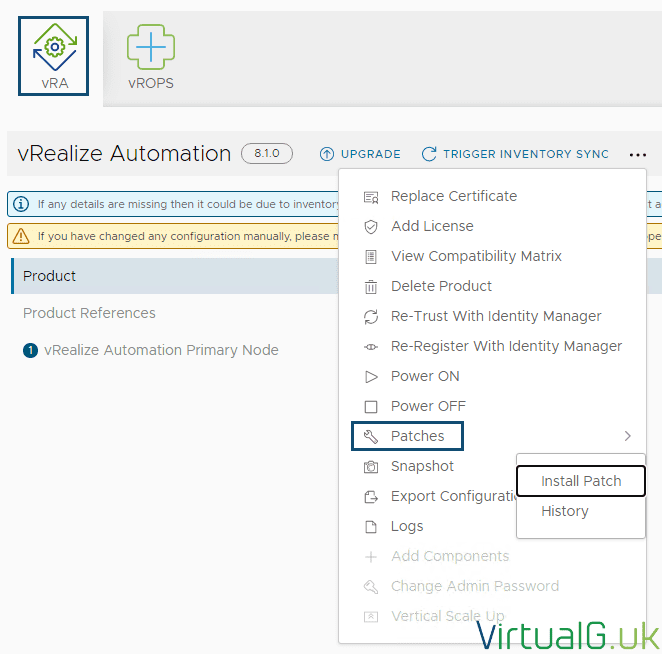
Before patching a product, be sure to take a snapshot. You can do this from within the UI (Select product > Snapshot > Create Snapshot)
Next, select the product to patch.
On the next page, select the patch to install.
As with upgrades, you’ll need to have added the relevant product binaries before you can select them.
Now simply follow the wizard. The patching wizard will differ depending on the product being patched.
Upgrading vRealize Components with vRealize Suite Lifecycle Manager
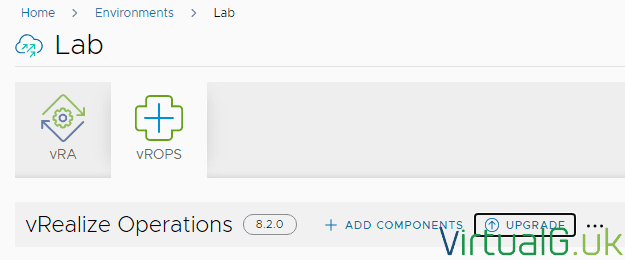
As with VRLCM itself, you can also upgrade vRealize products from within Lifecycle Manager.
Follow the same process as for patching, except when listing the products within the environment, select Upgrade.
Wrap-up
That’s it for the getting started guide, there is a lot more to Lifecycle Manager such as configuration & content management, identity management and the Marketplace, however, I hope this post has been a useful introduction to what vRealize Lifecycle Manager has to offer.
Don’t forget to subscribe to the mailing list for more VMware solution guides and updates.










[…] vRealize Suite Lifecycle Manager – Getting Started by Graham Barker (@virtualg_uk) Great Britain […]