Contents
Over 2 years ago I posted a how-to guide on how you can Monitor your SSL Certificate Expiry dates with vROps. With the new versions of vROps since then and the launch of VMware’s Aria Operations, a few things have changed so I am posting this new guide to reflect the newer version of the solution.
There are a few steps to get this to all work. You can read through this guide in order or use the links in the contents section (above) to skip out sections you already have working.
Deploy a vROps Cloud Proxy and connect to your vROps cluster
The vROps proxy allows you to connect many thousands of VMs to vROps via this middle-layer. This is necessary for scalability purposes by limiting the number of direct connections to the vROps cluster. As you can imagine, there is also a security benefit of deploying and using a vROps Cloud Proxy.
If you already have a suitably located Cloud Proxy setup in vROps, you can skip this step.
Deploy a vROps Cloud Proxy
From within the vROps User Interface, navigate to Data Sources > Cloud Proxies
Select New
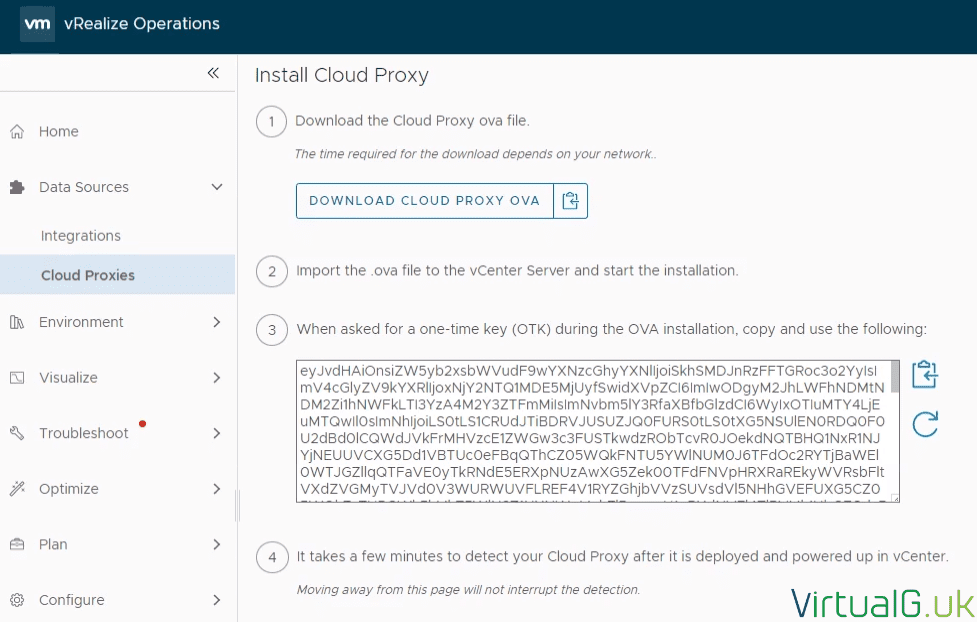
Deployment is as simple as following the on-screen instructions.
Preferably, use the copy option next to the Download Cloud Proxy OVA button and deploy the new OVA from within the vCenter server by using this URL. This will save you the time to download and re-upload to vCenter Server later.
Power on the Cloud Proxy
After you have deployed the OVA (Specifying the required information such as network information and the OTK (See above screenshot) then power on the appliance from vCenter Server.

I like to watch the VM console while the Cloud Proxy is powering on, once ready it will look like the following:
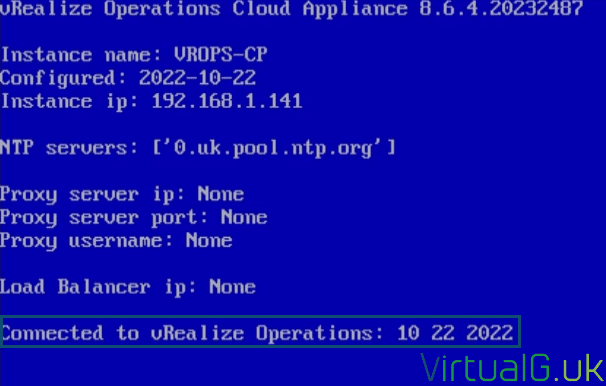
Check the Cloud Proxy is connected to vROps
After the Cloud PRoxy is deployed, within vROps navigate back to Data Sources > Cloud Proxies and you should see the new Cloud Proxy listed on the page. It usually takes 5 minutes to show up in the vROps UI.
Before continuing ensure the Cloud Proxy status is “Online”

Deploy the Telegraf agent on a Management VM
We now need somewhere for the SSL checks to run from. Ideally, this would be a Windows VM that is listed within your vROps environment. I’m calling this the Management System. This system will need to be able to communicate to the webservers you wish to monitor the SSL certificates for.
Install Telegraf onto a Virtual Management Machine (VM)
If your management system VM is monitored by vROps via the vCenter Server adapter, then you can automatically deploy, upgrade and manage the entire lifecycle of the agent directly from the vROps UI.
To do this, navigate to Environment > Applications > Manage Telegraf Agents
Select the VM to deploy the Telegraf agent onto.
Then select the three dots (…) to select the Install option
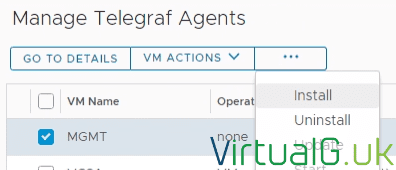
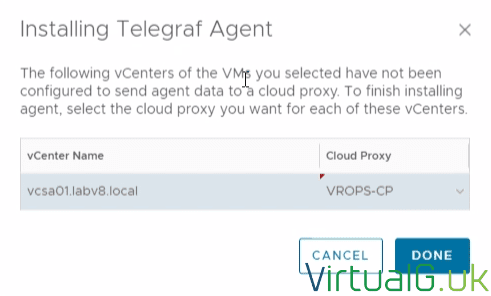
Select the correct Cloud Proxy in the next window and Done.
Provide Telegraf Agent Credentials
We now need to select or provide credentials for the agent installation
Since we are only installing one agent we can just choose to enter the virtual machine credentials.

You are now presented with some information about the credentials.
In this lab I will be installing the Telegraf agent onto a Windows machine with an administrator user account, UAC being already disabled but you should follow the guidelines accordingly for your environment and specific circumstances and security policies.
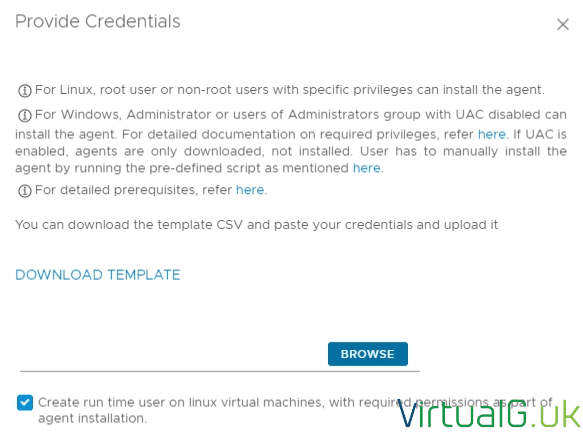
So for my lab environment, all I need to do is download the file and add my administrator account user and password towards the end of the line, under the correct heading:

You’ll notice that the VM Resource ID and other details are already pre-populated.
- Save the file and go back to the UI to upload it.
- Permanently delete the CSV file.
- Select Install Agent in the UI.
After a few moments and a refresh of the vROps UI, you will see the Last operation status of the agent change to Install in Progress. Wait for it to complete.

And complete:

Copy the PowerShell script to the Management system
Once the Agent is installed, copy the provided PowerShell script to the system, I have copied it into C:\Scripts\vrops-ssl-check.ps1
Add-Type @"
	using System.Net;
	using System.Security.Cryptography.X509Certificates;
	public class TrustAllCertsPolicy : ICertificatePolicy {
		public bool CheckValidationResult(
		ServicePoint srvPoint, X509Certificate certificate,
		WebRequest request, int certificateProblem) {
			return true;
		}
	}
"@
[System.Net.ServicePointManager]::CertificatePolicy = New-Object TrustAllCertsPolicy

[Net.ServicePointManager]::SecurityProtocol = [Net.SecurityProtocolType]::Ssl3, [Net.SecurityProtocolType]::Tls, [Net.SecurityProtocolType]::Tls11, [Net.SecurityProtocolType]::Tls12
$Website = $args[0]

try {
	$WebRequest = [Net.HttpwebRequest]::Create($Website)
	$WebRequest.Timeout = 5000
	$WebRequest.GetResponse() | Out-Null
	$SSLCertificateExpirationDateString = $WebRequest.ServicePoint.Certificate.GetExpirationDateString()
	$SSLCertificateDateTime = [Datetime]::ParseExact($SSLCertificateExpirationDateString, "dd/MM/yyyy HH:mm:ss", $null)
	$SSLCertificateDaysRemaining = ($SSLCertificateDateTime - $(Get-Date)).Days

	Write-Host $SSLCertificateDaysRemaining
}

catch {
	Write-Host "ERROR|$error"
}
Test the script is working
Open a PowerShell terminal on the Management System VM
Try the following:
- C:\Scripts\vrops-ssl-check.ps1 https://virtualg.uk 443
- Change the FQDN and Port as necessary
The script should return the number of days left before the SSL certificate expires:

In my case, the number 83 is returned. We can confirm this by looking at the SSL certificate of the website:

A quick check via an online “Days until” calculator suggests the number of days until 13th January 2023 (when the certificate expires) is 83 days, so the script is working correctly.
Setup the Custom Script
Back in the vROps UI, Open Applications > Manage Telegraf Agents
Locate your Management System and select the dropdown icon to the left of the VM Name

Select the three dots (…) next to Custom Script and press Add.
On the pane on the right of the page, enter the following details:
- Display Name SSL Check virtualg.uk
- For the Display Name (I suggest you use the FQDN of the domain you wish to monitor the SSL certificate expiry for here)
- File Path C:\Scripts\vrops-ssl-check.ps1
- Prefix powershell
- Args https://virtualg.uk 443
- For the Args, the first arg should be the address of the web server with the SSL cert to monitor and the second should the SSL port, ie 443
- Timeout 1 minute
Save the Custom Script
Add additional scripts, one per webserver to monitor
Test the script is working in vROps
Within the vROps UI, navigate to Environment> Object Browser > All Objects > VMware vRealize Application Management Pack > Custom Script > and select “Custom Script on (Your VM name here)“
This will open up a summary tab:
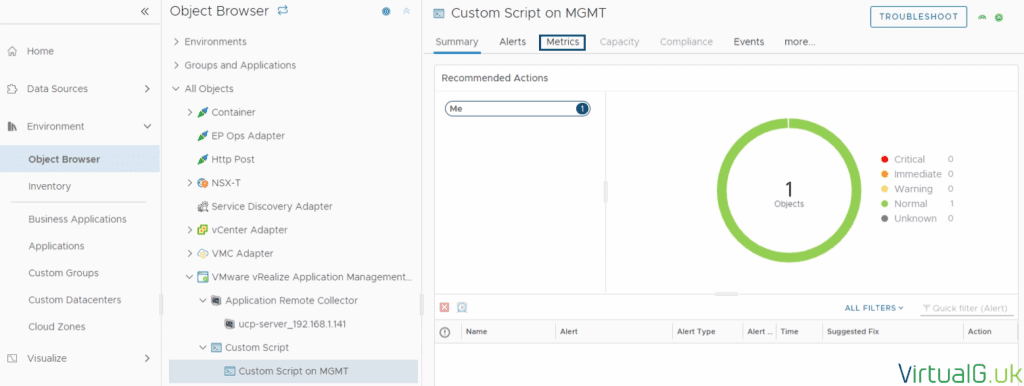
Select the Metrics Tab on the top
Expand Metrics > Scripts > SSL Check virtualg.uk on (Your VM Name) or equivilent
Now you can see the number of days until expiry for the corresponding SSL certificate in a standard metric picker.

If your Custom Script is not showing, wait 5 minutes and try again.
With this data now in vROps, you can create Symptoms, Alerts, Views, Metrics, and Reports based on this metric. You could of course modify the script to output different data but be aware that each script can only output one metric value. You can create multiple scripts and add them as Custom Scripts against your Management System to bring them into vROps.
Don’t forget that for each website you wish to monitor, you’ll need to create a new Custom Script entry against the VM. Recall that you do this under Environment > Applications > Manage Telegraf Agents > Select the dropdown next to the VM with the agent installed, then the three dots next to Custom Script and Add.
Installing the vROps SSL Dashboard
Download the Dashboard I created over at the official VMware Developer Portal (No login required to download) https://developer.vmware.com/web/dp/samples?id=8001
Navigate to Visualize > Dashboards within the vROps UI
Select Manage > (three dots) > Import
Upload the Dashboard JSON file which we downloaded earlier
Open the new dashboard with the name SSL Certificate Expiry Dashboard
Action > Edit
You can delete the Instructions Widget at the top of the page
On the SSL Certificates Widget, select the pencil to edit it
Under Scoreboard > Configuration change Self Provider to On
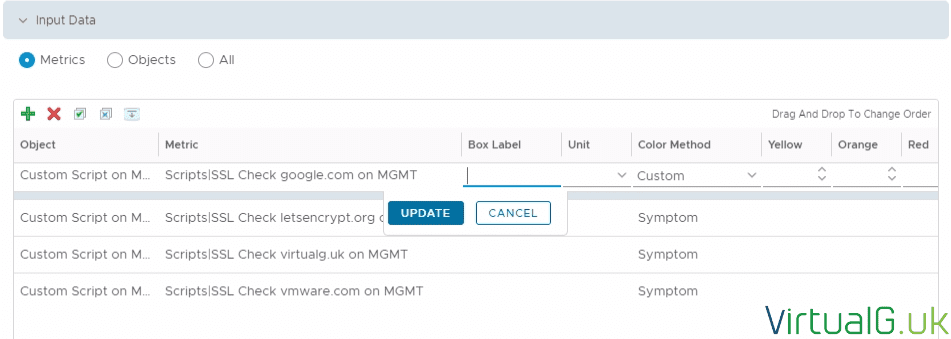
Under Input Data select Metrics Then the plus + icon
Use the search on the left side for “Custom Script” and select the correct Management System from earlier:
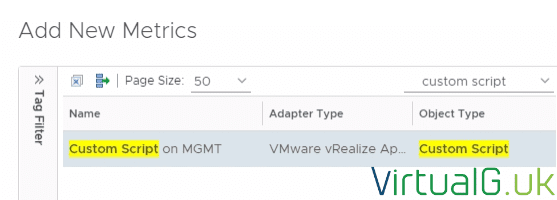
Now on the right side expand Metrics > Scripts
Select all the scripts to show on the dashboard. You can use the CTRL key to select more than one.
Save the dashboard, or make further cosmetic changes to the scoreboard widget as required (For example changing the values to Yellow, Orange, or Red depending on the number of days until SSL certificate expiry)
You can also add a link for each SSL certificate check to go to the appropriate site by clicking the metric in the dashboard.
Save the Dashboard
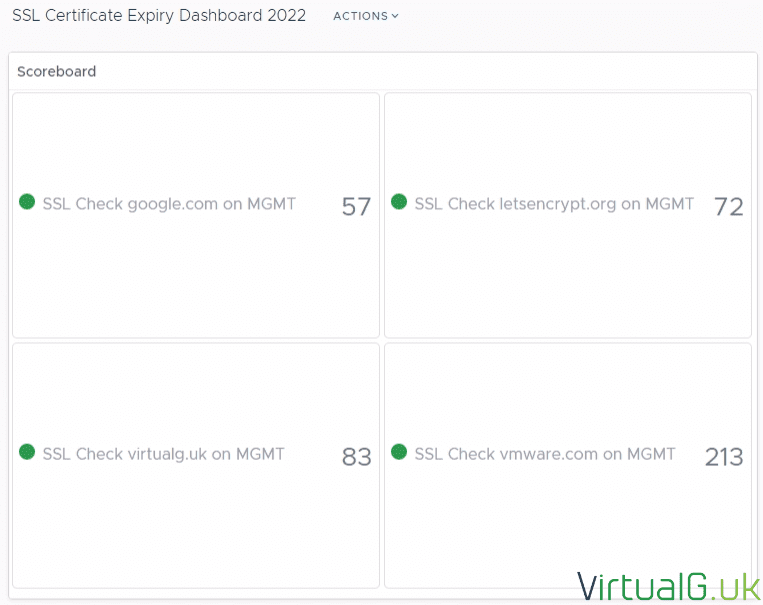
Now you have a simple way to monitor your SSL Certificate expiry dates. Remember you can also make Symptoms, Alerts, and Reports based on this data.
Feedback
If you found this guide useful, consider subscribing to my mailing list or following me on Twitter @Virtualg_UK for more useful guides and updates.
You can use those platforms to contact me about any issues or suggestions for this guide.
I also upload various VMware-related content on YouTube.


